Beejartha

Categories
Oracle Fusion Cloud

Oracle Fusion Cloud User Creation

NOTE: This article assumes that user is new to Oracle Cloud ERP and is in the process of learning with examples.

Login to instance: https://fa-euth-dev25-saasfademo1.ds-fa.oraclepdemos.com/
Use the current admin username: and password: <**********>

Go to Tools> Security Console> Users> Add User and fill in the details as below:

How to Add User

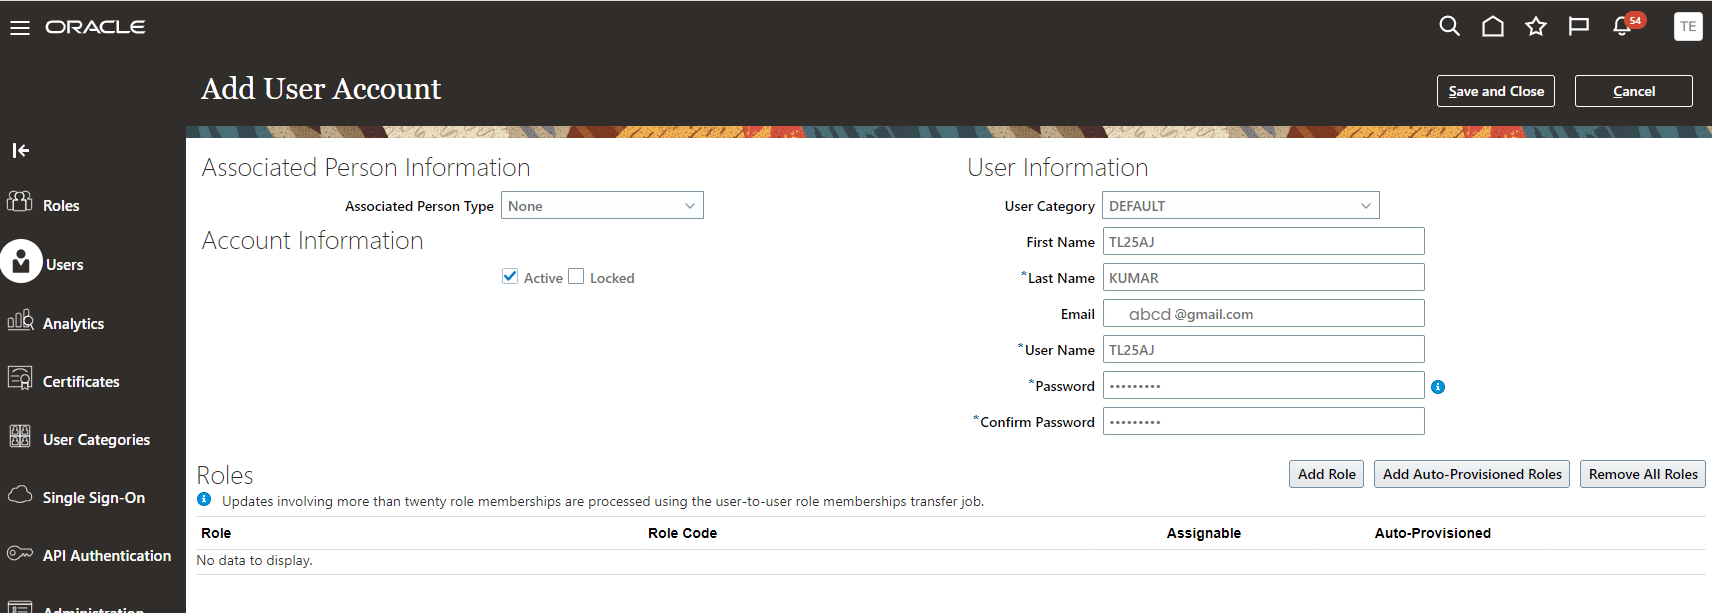
Instance: https://fa-euth-dev25-saasfademo1.ds-fa.oraclepdemos.com/
username: TL25AJ
password: <**********>

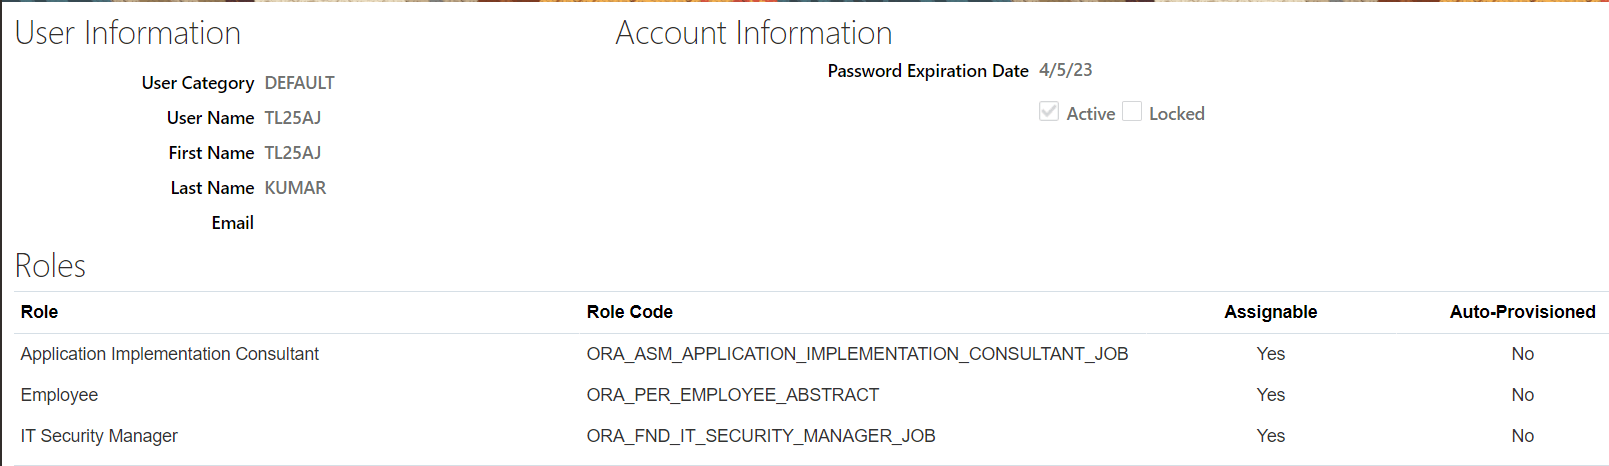
Click on Save and Close and open this user in new window. Initially there are not much roles associated to the user so you need to add one more ABSTRACT role ‘Employee’ as below:

Add ‘Application Implementation and Consultant’ to get couple of generic applications access
Add ‘IT Security Manager’ role to get access for security console:

Adding above 3 roles to user account will give complete access to oracle fusion application access. Since ‘Security Console’ role access is like ‘System Administrator’ access from R12, you can add any other role to user using this role.

Adding roles to user account

NOTE: Always add roles that start with ORA_XXX_XXX_JOB or ORA_XXX_XXX_DUTY for assigning seeded oracle roles

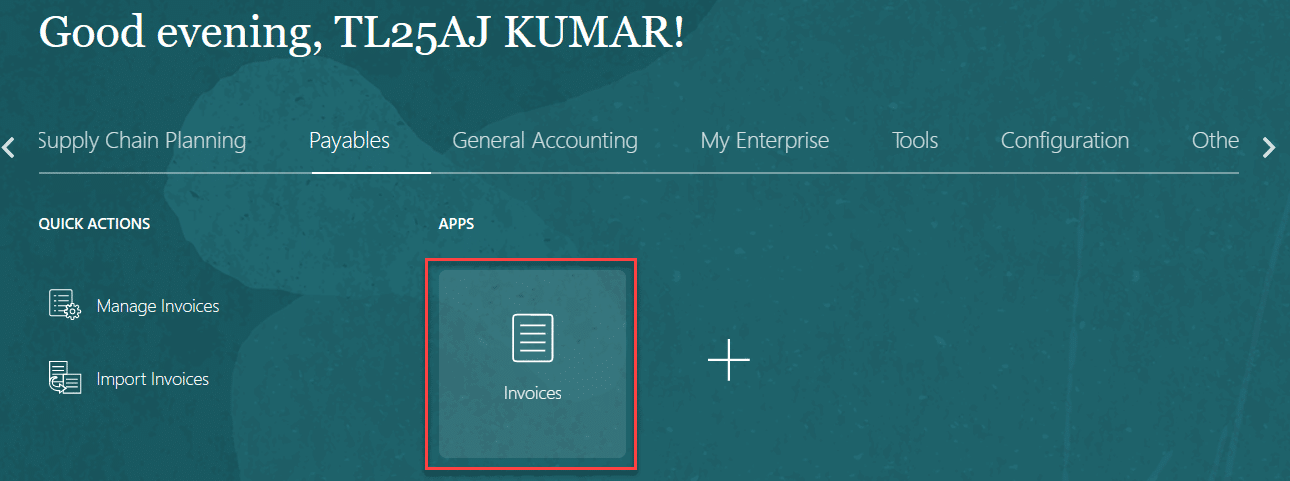
Once the above roles are added login to cloud fusion instance again as TL25AJ user, you should see new privileges (responsibilities/menus/functions per R12) added to user. They will be visible in ‘Springboard’ view.

The same features can also be viewed in ‘Navigator’ screen (hamburger icon on top left icon)

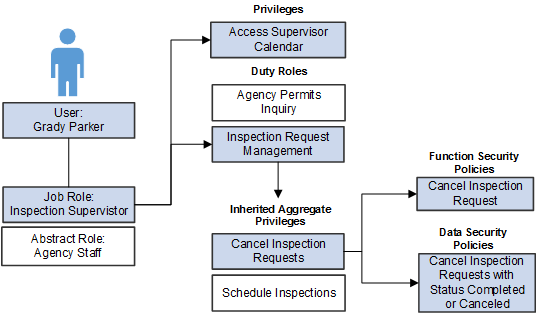
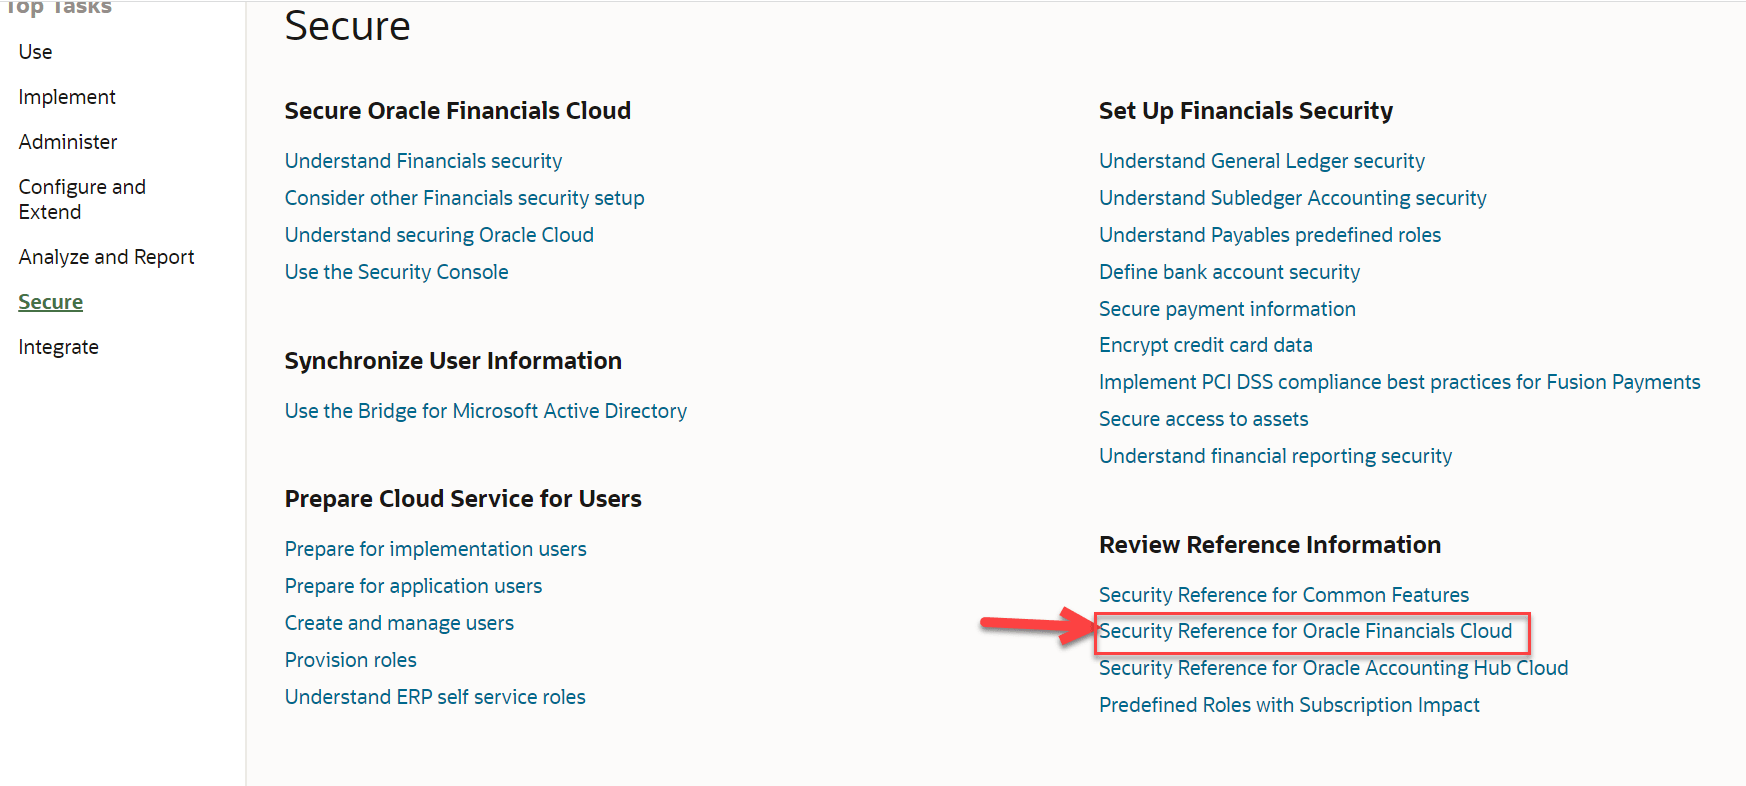
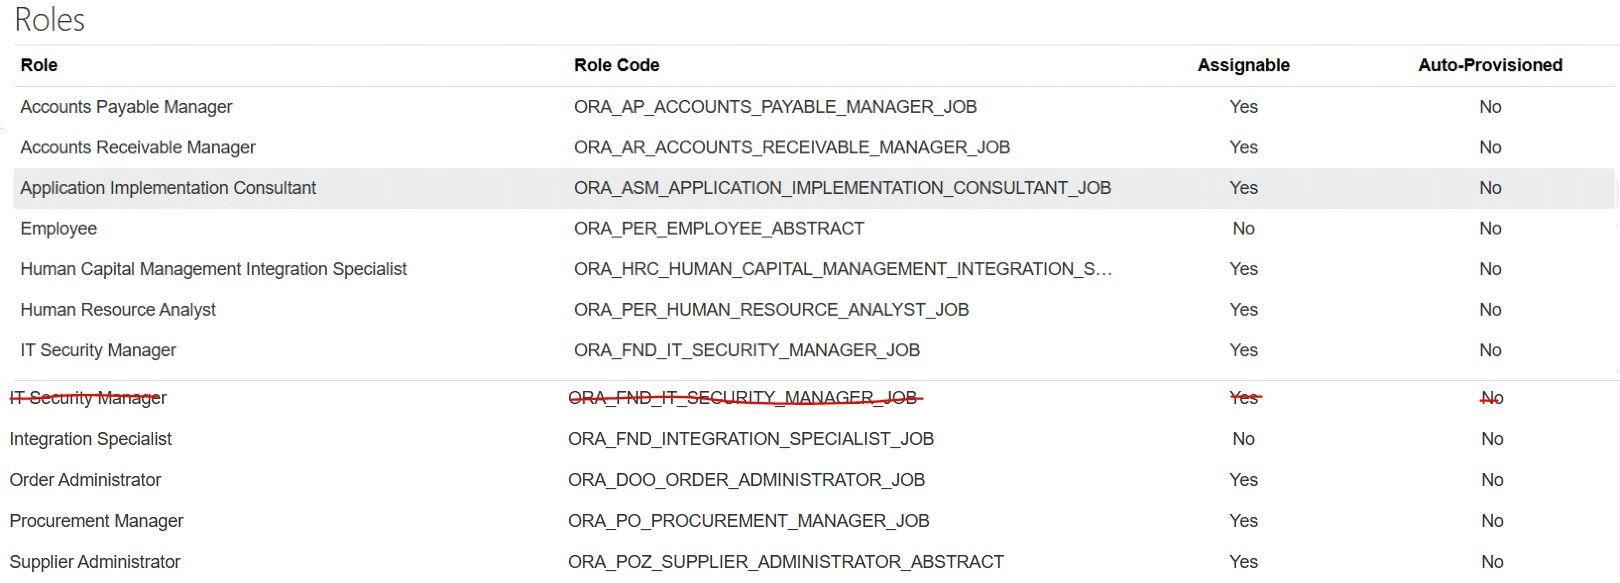
Here are few important job (responsibility) roles that users need:

Accounts Payable Manager
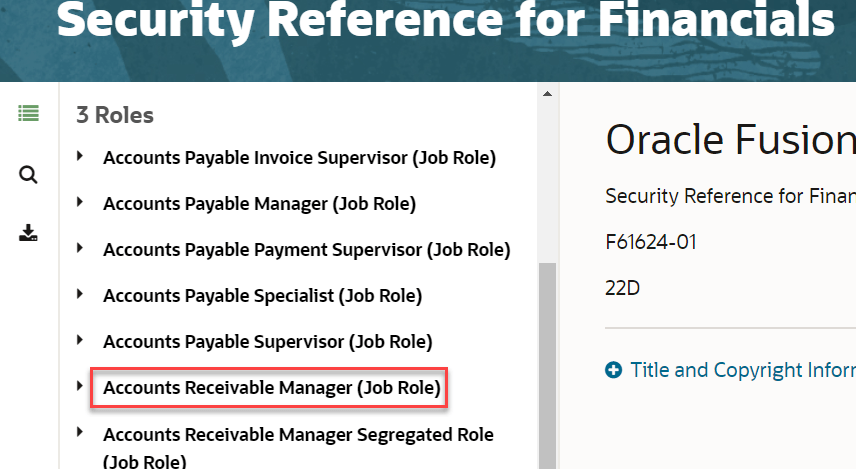
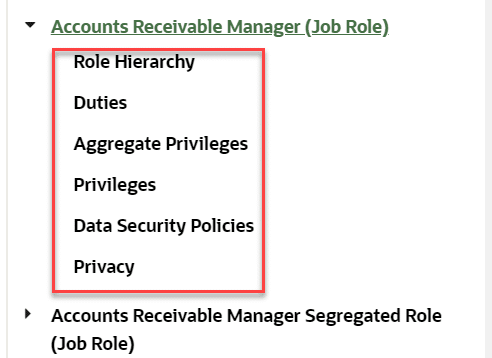
Accounts Receivable Manager
Human Resource Analyst
Human Capital Management Integration Specialist This job role will be used for inbound and outbound integrations
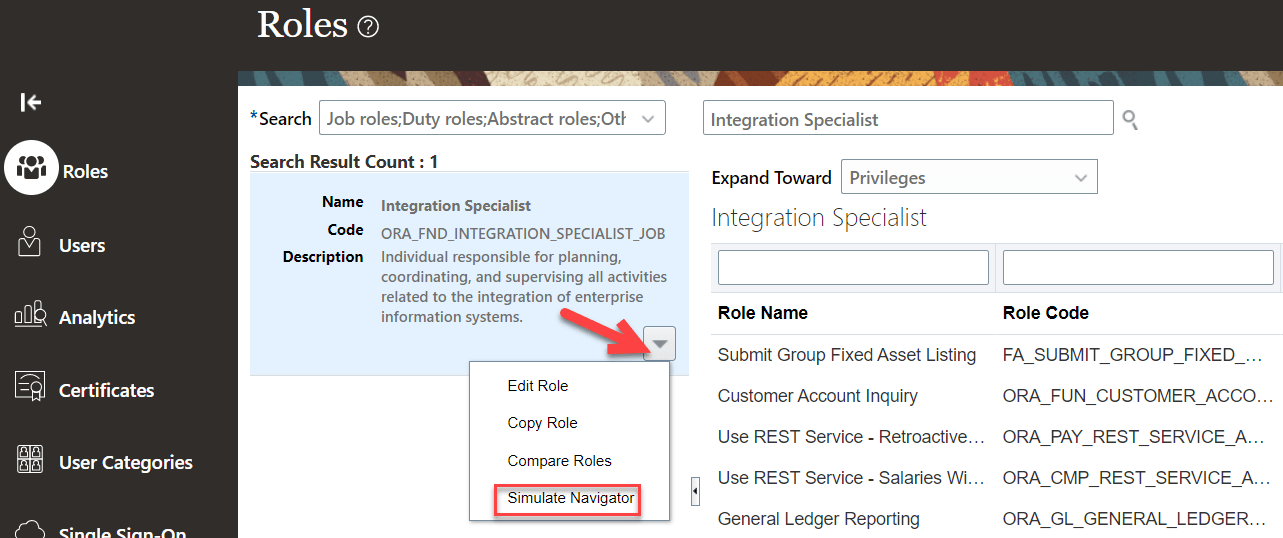
Integration Specialist This job role will give access to all web services and REST APIs when working with OIC
Order Administrator For sales orders related maintenance
Procurement Manager
Supplier Administrator

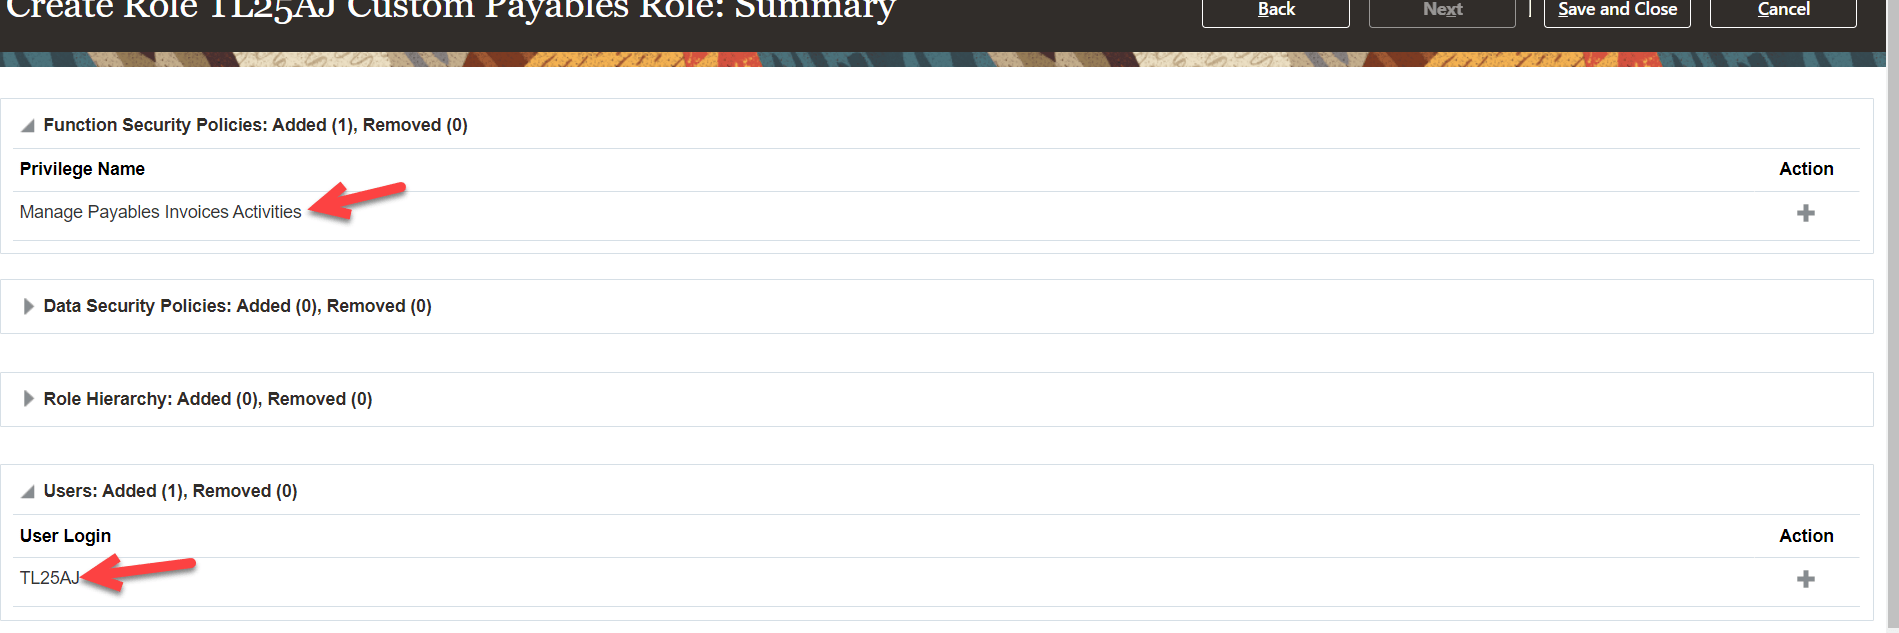
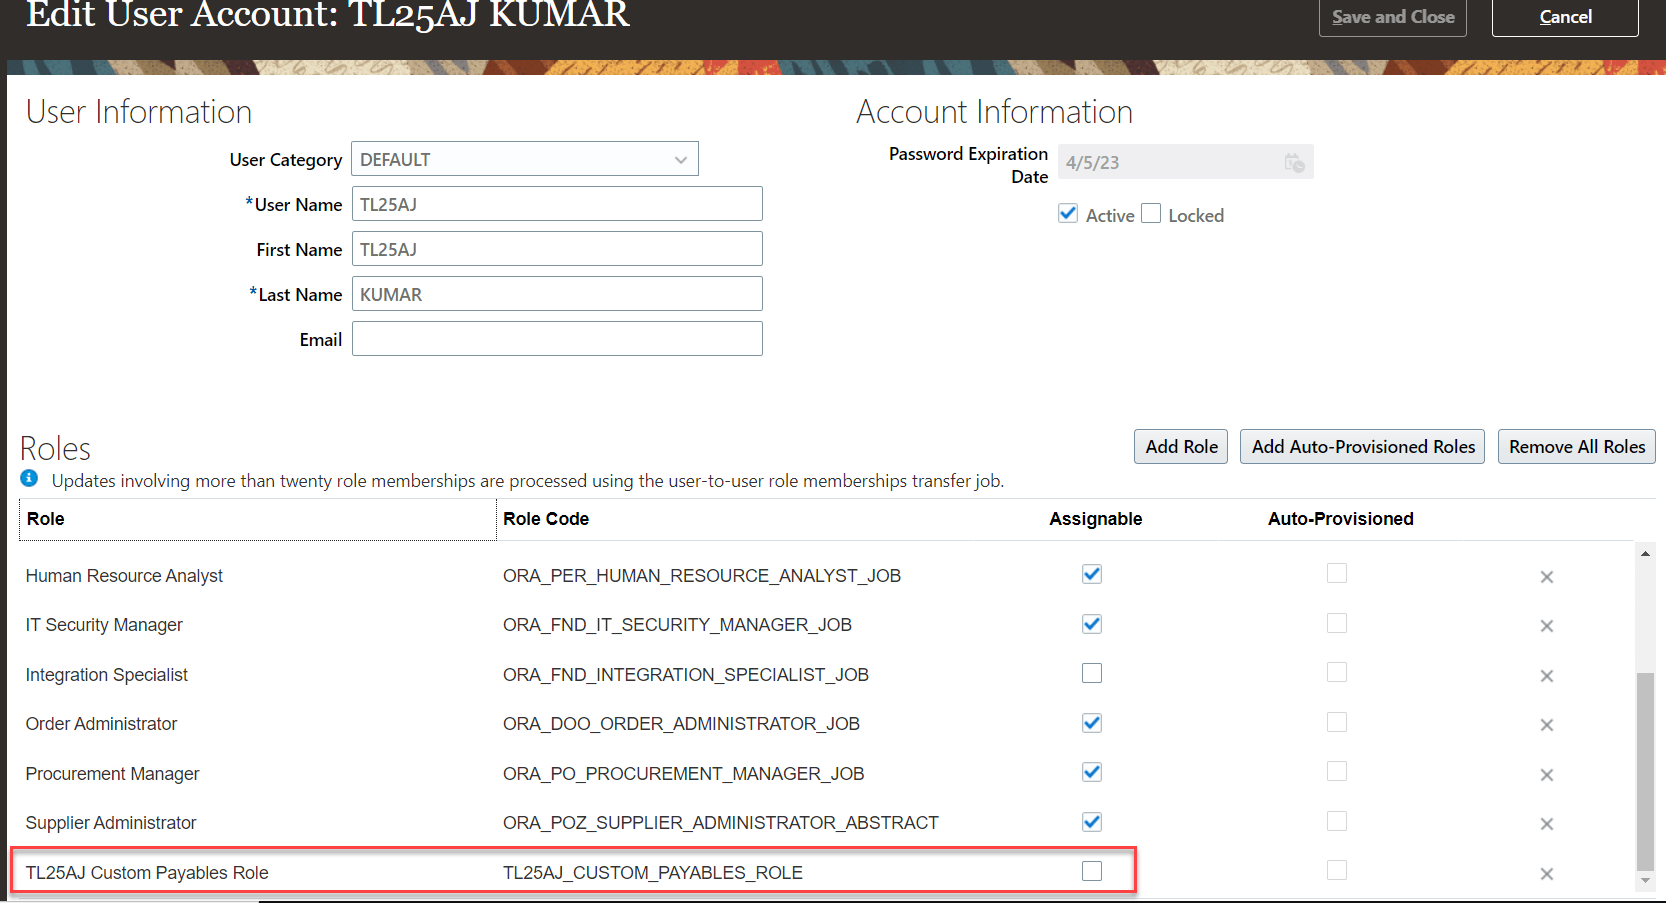
Below are all the roles added to TL25AJ user account:

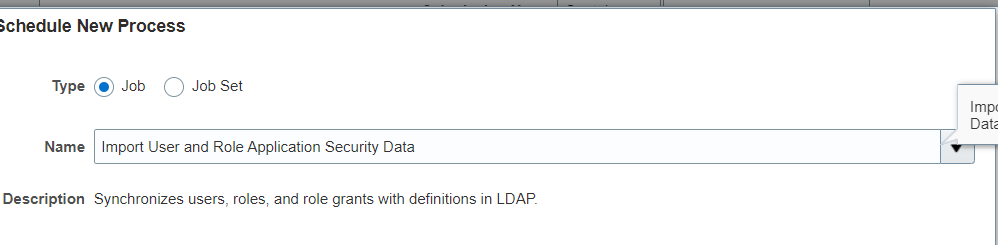
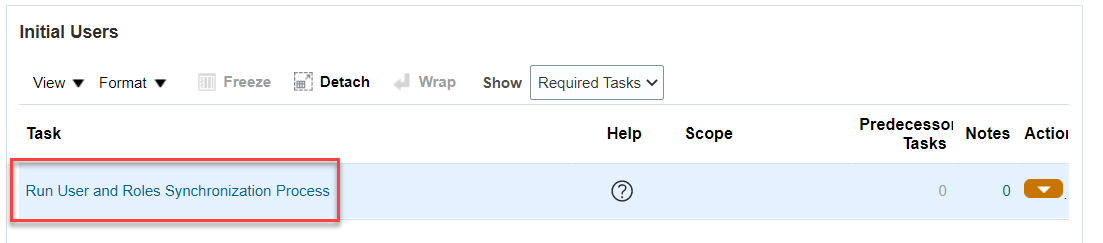
Logout of application and login to see new job roles associated to user. Sometimes synchronization between LDAP server and Oracle Fusion server takes time (information has to go to LDAP and then changes should be communicated back to Fusion Cloud instance).

Categories
Oracle Fusion Cloud

Oracle Fusion Cloud Role Creation and Assignment

All Oracle Fusion applications information is available in Oracle Enterprise Repository for Oracle Fusion Applications – https://fusionappsoer.oracle.com/
After logging to this site click on Cloud Applications link as shown below:

System will take you to below page, then click on ‘Financials’ link to get all details:

In order to understand more about Roles and Users click on ‘Secure’ link on left hand side menu as shown below, keep drilling till you reach the Job Role you like and identify the Duty, Privilege roles etc. associated to this issue.


Categories
Oracle Fusion Cloud

Oracle Fusion Payables Role Creation

NOTE: This article assumes that user is new to Oracle Cloud ERP and is in the process of learning with examples.

Login to instance: https://fa-euth-dev25-saasfademo1.ds-fa.oraclepdemos.com/
Use the current admin username: and password: <**********>

EXERCISE: Create a custom Payables Application roles that will create or view invoices only and assign it to TL25AJ user
SOLUTION
STEP1 – Go to Fusion cloud Security Console> Search for TL25AJ user > Edit user> Remove ‘Accounts Payable Manager’ job role since this already has the create or view invoices only privilege role

STEP2 – Go to Security Console> Roles> Open any role ex: Integration Specialist> Drop down arrow> choose ‘Simulate Navigator’>

System will open the Simulate Navigator like below:

Search for ‘Payables’ section> click on ‘Invoices’> click on ‘View Privileges Required for Menu’ and add privileges next to task names ‘Create Invoice’ and ‘Manage Invoices’ (and also ‘Invoice Workbench’ since all 3 tasks are linked to same privilege)

STEP3 – Go to Security Console> Roles> Create Role> create the role with below details> Click Next button
Role Name:TL25AJ Custom Payables Role
Role Code:TL25AJ_CUSTOM_PAYABLES_ROLE
Role Category: Common – Job Roles (NOTE: This could be specific to any specific module like Finance, SCM or HCM also)
Description: This role is used to provide access only for creation and view of payables invoices

In step 2 click on ‘Add Function Security Policy’ choose oracle seeded privilege ‘Manage Payables Invoices Activities’

Add user TL25AJ user to this newly created job role with specific privileges

Below is the summary of new role creation> Save and Close

In order for making above changes effective, we have to run 3 ESS jobs. These will apply custom role changes to user
a) Send Pending LDAP Requests – Manages requests to create or update users, roles and role grants in LDAP.
b) Retrieve Latest LDAP Changes – Synchronizes users, roles, and role grants with definitions in LDAP.
c) Import User and Role Application Security Data

In order to run the jobs go to Tools> Scheduled Processes> Schedule New Process>No need to submit any parameter values> click on ‘Submit’

Similarly submit ‘Retrieve Latest LDAP Changes’ request
Similarly submit ‘Import User and Role Application Security Data’ request

Another option is to click on top right corner on user logo>Settings and Actions> Administration> Setup and Maintenance> Choose ‘Run User and Roles Synchronization Process’ to mimic all the 3 ESS jobs submitted above

Logout of TL25AJ user and log back in > Payables>You will see there is only one privilege to view ‘Invoices’

Similarly you can create a new JOB role by copying a standard JOB role and in that remove any unwanted PRIVILEGE (Function Security) and DUTY (Role Hierarchy) roles and save JOB role name with client name prefix and CUSTOM tag at end.

ASSIGNABLE – Any custom role by default will not be assignable. This means this role cannot be delegated to other users until the checkbox is chosen

Auto-Provisioned roles are roles that are assigned to user based on business unit and certain conditions. Job roles are assigned to this Auto-Provision rule and users who satisfy the rule conditions are automatically assigned the job roles tied to this rule.