Beejartha

Categories
ORACLE E-BUSINESS SUITE (EBS)

ASADMIN Failed to be Authenticated Error

Problem
After cloning our E-Business Suite production environment our test environment, we attempted to deploy our REST based web services and saw the following error:


java.lang.SecurityException: User: ASADMIN~~TEST, failed to be authenticated.

We decided to reset the ASADMIN password. The steps below were executed on our test environment.

Solution

Step 1: Log in to E-Business suite application

Log in with an account that has User Management responsibility. If one is not available, you can log in with the SYSADMIN account.

Step 2: Reset the ASADMIN user password

Click the “User Management” menu item
Click the “Users” menu item
You are now in the “Oracle User Management” page
In the “User Name” field, enter ASADMIN
Click the Go button
A record for the ASADMIN user will appear in a table. Click the “Reset Password” icon next to ASADMIN user
You are now in the “Reset Password” page
Choose the “Enter Manually” option
Enter a temporary password (you will change it again in the next step)
Click the Submit button

Step 3: Log in and Change the ASADMIN password
Log in to E-Business Suite application as the ASADMIN user. You will be prompted to change the ASADMIN password. Enter the temporary password you entered in the previous step, and then a new password.

Step 4: Create and deploy the OAEADatasource on the Oracle E-Business Suite WebLogic Administration server
Note, this command will stop and start all application tier services.
As applmgr on the WebLogic Administration server


unix> ant -f $RUN_BASE/EBSapps/comn/java/classes/oracle/apps/fnd/txk/util/txkISGConfigurator.xml
ebsSetup -DforceStop=yes –DforceAuthenticationProviderExists=true -DforceDataSourceExists=true

You will need to answer the following prompts:


[input] Enter the password for user APPS :
[input] Enter the ASADMIN user name : [ASADMIN]
[input] Enter the password for user ASADMIN :
[input] Enter the password for user weblogic :

Step 5: Deploy web service
Deployed REST web services. They completed without errors.

Step 6: Run fs_clone to copy the REST configuration changes
Run the clone script to copy the REST configuration changes to the patch file system. This script will run in the background and will not interfere with normal operations. Users can connect and work on E-Business Suite normally.

As applmgr


unix> adop phase=fs_clone

Categories
ORACLE E-BUSINESS SUITE (EBS)

Pending ADOP Session Error When Running Rapid Clone

Recently, we were attempting to clone our EBS environment:


unix> . /opt/app/oracle/apps/EBSapps.env run
unix> cd $ADMIN_SCRIPTS_HOME
unix> perl adpreclone.pl appsTier

And got the following error:

There is already an ACTIVE ADOP CYCLE with session id : 94
adpreclone cannot be run with pending ADOP session

The message is straightforward and claims we have an active online patch cycle. We checked the status:


unix> adop -status

And it turns out we do:

Node Name Node Type Phase Status Started Finished Elapsed
beejartha master PREPARE COMPLETED 2024/01/01 13:01:33 2024/01/01 13:24:47 0:23:14
APPLY NOT STARTED
FINALIZE NOT STARTED
CUTOVER NOT STARTED
CLEANUP NOT STARTED

Solution

The clone cannot be done until a patch cycle is completed or aborted. In this case, we decided to abort the online patch cycle. This will drop the database patch edition and return everything to the normal runtime state.

We did the following:


unix>adop phase=abort
unix>adop phase=cleanup cleanup_mode=full
unix>adop phase=fs_clone

Checking the status of the online patch cycle again we see the following


unix> adop -status

Node Name Node Type Phase Status Started Finished Elapsed
beejartha master PREPARE SESSION ABORTED 2024/01/01 13:01:33 2024/01/01 13:24:47 0:23:14
APPLY SESSION ABORTED
FINALIZE SESSION ABORTED
CUTOVER SESSION ABORTED
CLEANUP COMPLETED 2024/01/01 14:09:56 2024/01/01 14:12:20 0:02:24

Now that the patch cycle has been aborted, we can successfully run the pre-clone script.

Categories
ORACLE E-BUSINESS SUITE (EBS)

Installing a WebLogic Server Patch

Introduction

From time to time, we need to install patches on our WebLogic Server (WLS). Oracle provides the Smart Update utility (bsu.sh) to install and remove these patches.

Below are examples of installing, removing, and listing these patches on our WLS in our E-Business Suite 12.2 environment running on a Linux server

Install a WebLogic Server Patch

Step 1: Download the patch from My Oracle Support and upload to the WebLogic Server host

Step 2: Copy patch to the cache_dir and uncompress

As the applmgr user

unix> cp p12345678_R12_GENERIC.zip $FMW_HOME/utils/bsu/cache_dir
unix> cd $FMW_HOME/utils/bsu/cache_dir
unix> unzip -o p12345678_R12_GENERIC.zip

Step 3: Set environmental variables

As the applmgr user

unix> export ORACLE_HOME=$FMW_Home/wlserver_10.3
unix> export PATH=$ORACLE_HOME/OPatch:$PATH

Step 4: Install the patch

As the applmgr user

unix> cd $FMW_HOME/utils/bsu
unix> ./bsu.sh -install -patch_download_dir=$FMW_HOME/utils/bsu/cache_dir -patchlist=ABCD \
-prod_dir=$FMW_HOME/wlserver_10.3 -log=/tmp/ABCD.log -log_priority=trace

Remove a WebLogic Server Patch

Step 1: Set environmental variables

As the applmgr user

unix> export ORACLE_HOME=$FMW_Home/wlserver_10.3
unix> export PATH=$ORACLE_HOME/OPatch:$PATH

Step 2: Remove the patch

As the applmgr user

unix> cd $FMW_HOME/utils/bsu
unix> ./bsu.sh -remove -patchlist=ABCD -prod_dir=$FMW_Home/wlserver_10.3

List Applied Patches

Step 1: Set environmental variables

As the applmgr user

unix> export ORACLE_HOME=$FMW_Home/wlserver_10.3
unix> export PATH=$ORACLE_HOME/OPatch:$PATH

Step 2: Remove the patch

As the applmgr user

unix> cd $FMW_HOME/utils/bsu
unix> ./bsu.sh -prod_dir=$FMW_HOME/wlserver_10.3 -status=applied -verbose -view

Categories
ORACLE E-BUSINESS SUITE (EBS)

Change WebLogic Administration User Password

Introduction

Below are the steps to change the Oracle WebLogic Administration user password. You will change the password on the run file system and then copy the changes to the patch file system.

The steps below assume you know the existing password. A lost or forgotten password has a different process.

Change the Node Manager Password

Before changing the Administration user password, you must first change the Node Manager password by doing the following:

  • Log in to the WebLogic Server Administration console
  • In the ‘Change Center’ panel, click the ‘Lock & Edit’ button
  • In the ‘Domain Structure’ panel, click on the ‘EBS_domain’ link
  • In the ‘Settings for EBS_domain’, select the ‘Security’ tab
  • Click on the ‘Advanced’ link
  • Enter your new Administration user password in the ‘Node Manager password’ and ‘Confirm Node Manager Password’ fields
  • Click the ‘Save’ button at the bottom of the page
  • In the ‘Change Center’ panel, click on ‘Activate changes’ and log out

Change the Administration User Password

Step 1. Shut down all application tier services except the WebLogic Administration Server

On the primary application server, log in as the applmgr user and run the following command

unix> $ADMIN_SCRIPTS_HOME/adstpall.sh -skipNM -skipAdmin

If you have other application servers, shut down all application tier services

unix> $ADMIN_SCRIPTS_HOME/adstpall.sh

Step 2. Change the Oracle WebLogic Server Administration User password

As applmgr on the primary application server

unix> . /opt/app/oracle/apps/EBSapps.env run
unix> perl $FND_TOP/patch/115/bin/txkUpdateEBSDomain.pl -action=updateAdminPassword

Step 3. Start all services on all application servers

As applmgr on the primary

unix> $ADMIN_SCRIPTS_HOME/adstrtal.sh

Step 4. Run fs_clone to change the password on the patch file system

Open a new terminal window, log in as applmgr and run the following

unix> . /opt/app/oracle/apps/EBSapps.env run
unix> adop phase=fs_clone

Categories
ORACLE E-BUSINESS SUITE (EBS)

Clone a Database to Point-in-Time with RMAN

Introduction

Recently we needed to refresh our Development environment with Production data from February 29th. Normally we would use a third-party tool but were having issues and decided to restore the database manually. Here is what we did.

Note, in the example below, our EBS Production CDB/PDB database is PRODCDB/PROD and Development database is DEVLCDB/DEVL. The Production server is ebsprod and the Development server is ebsdevl.

Clone the Database

Step 1: Confirm entries in the oratab file

First, we confirmed we have the following in our /etc/oratab file on our Development server


DEVLCDB:/opt/app/oracle/product/19.3.0/dbhome_1:N
DEVL:/opt/app/oracle/product/19.3.0/dbhome_1:N

Step 2: Create new LISTENER file

We created a new $TNS_ADMIN/listener.ora file on our Development server and added the following


SID_LIST_LISTENER =
(SID_LIST =
(SID_DESC =
(GLOBAL_DBNAME = DEVLCDB)
(ORACLE_HOME = /opt/app/oracle/product/19.3.0/dbhome_1)
(SID_NAME = DEVLCDB)
)
)

Step 3: Add entries to TNSNAMES file

We added the following to the $TNS_ADMIN/tnsnames.ora on our Development server


DEVLCDB =
(DESCRIPTION =
(ADDRESS = (PROTOCOL=tcp)(HOST=ebsdevl.beejartha.com)(PORT=1521))
(CONNECT_DATA = (SERVICE_NAME=DEVLCDB)(INSTANCE_NAME=DEVLCDB))
)
ebsdevl:1521 =
(DESCRIPTION =
(ADDRESS = (PROTOCOL=tcp)(HOST=ebsdevl.beejartha.com)(PORT=1521))
)
DEVLCDB_REMOTE =
(DESCRIPTION =
(ADDRESS = (PROTOCOL=tcp)(HOST=ebsdevl.beejartha.com)(PORT=1521))
)

Step 4: Copy the init/password files to the Development server

Next, from our Development server, we copied the init.ora and password files from the Production server


unix> cd $ORACLE_HOME/dbs
unix> scp -p oracle@ebsprod:/opt/app/oracle/product/19.3.0/dbhome_1/dbs/initPRODCDB.ora .
unix> scp -p oracle@ebsprod:/opt/app/oracle/product/19.3.0/dbhome_1/dbs/orapwPRODCDB .

Step 5: Create init.ora for the Development database

We then renamed the initPRODCDB.ora to initDEVLCDB.ora.
We edited the initDEVLCDB.ora file and changed all references of the Production database and server to the Development database and server (ie, PROD to DEVL, ebsprod to ebsdevl).

Step 6: Create directories specified in the init.ora file

We created any directories that are referenced in the initDEVLCDB file. For example, we needed to create the /opt/app/oracle/admin/DEVLCDB/adump directory for the audit file destination parameter.

Step 7: Start Development database
We now start the Development database using the new init.ora file in nomount mode


unix> export ORACLE_SID=DEVLCDB
unix> sqlplus sys as sysdba
SQL> startup nomount pfile='/opt/app/oracle/product/19.3.0/dbhome_1/dbs/initDEVLCDB.ora';
SQL> exit;

Step 8: Start RMAN and connect to the development database


unix> export NLS_DATE_FORMAT='DD-MON-YYYY HH24:MI:SS'
unix> rman target / nocatalog

Step 9: Restore the controlfile


RMAN> run {
allocate channel ch1 type 'sbt_tape' PARMS="...";
restore controlfile from 'c-3061845234-20240202-0a';
}

Step 10: Mount the database

Once the control file is restored successfully, mount the database.


RMAN> alter database mount;

Step 11: Preview restore (optional)

We ran a report to see what backups and archived log files that RMAN will use to restore and recover the February 29th database. Note, this is optional only generates a report. It does not actually restore the database.


RMAN> run {
allocate channel ch1 type 'sbt_tape' PARMS="...";
set UNTIL TIME "to_date('02/02/2024 11:59:59 pm','mm/dd/yyyy hh:mi:ss am')";
restore database preview summary;
}

Step 12: Restore and Recover the database

Now we restored and recover the database to February 29th at 11:59:59pm


RMAN> run {
allocate channel ch1 type 'sbt_tape' PARMS="...";
allocate channel ch2 type 'sbt_tape' PARMS="...";
allocate channel ch3 type 'sbt_tape' PARMS="...";
allocate channel ch4 type 'sbt_tape' PARMS="...";
set UNTIL TIME "to_date('02/29/2024 11:59:59 pm','mm/dd/yyyy hh:mi:ss am')";
restore database;
recover database;
}

Categories
ORACLE E-BUSINESS SUITE (EBS)

Aborting an ADOPPatch Cycle

Introduction

When running an ADOP patch cycle, if the prepare, apply, or finalize phases fail, you have the option of aborting the cycle and starting again.

For example, when applying a patch last week, we got the following error:

*******FATAL ERROR*******
PROGRAM : (/opt/app/oracle/apps/fs2/EBSapps/appl/ad/12.0.0/bin/adzdoptl.pl)
TIME : Thu Jan 25 16:15:44 2024
FUNCTION: ADOP::GlobalVars::_validateApplyRestartArgs [ Level 1 ]
ERRORMSG: When running adop after a previous patching cycle failed, you must specify either the 'abandon' or 'restart' parameter.
[STATEMENT] Please run adopscanlog utility, using the command
"adopscanlog -latest=yes"
to get the list of the log files along with snippet of the error message corresponding to each log file.
adop exiting with status = 255 (Fail)

We decided to abort the patch cycle so all changes were rolled back and we could start over.

Aborting a Patch Cycle

Step 1: Source the Applications environment and abort the current patch cycle

As the applmgr user

unix> . /opt/app/oracle/apps/EBSapps.env run
unix>adop phase=abort

If successful, you will see the following

The abort phase completed successfully.
adop exiting with status = 0 (Success)

Step 2: Confirm the cycle was aborted (optional)

As the applmgr user

unix>adop -status

You should see output similar to the following:

==============================================================
ADOP (C.Delta.14)
Session Id: 94
Command: status
Output: /opt/app/oracle/apps/fs_ne/EBSapps/log/adop/91/20240126_094640/adzdshowstatus.out
===============================================================

Node Name Node Type Phase Status Started Finished Elapsed
beejartha master PREPARE SESSION ABORTED 2024/01/25 14:40:30 2024/01/25 15:04:40 0:24:10
APPLY SESSION ABORTED 2024/01/25 16:01:04 2024/01/26 09:28:28 17:27:24
FINALIZE SESSION ABORTED
CUTOVER SESSION ABORTED
CLEANUP NOT STARTED

File System Synchronization Type: Light
INFORMATION: Patching cycle aborted, so fs_clone will run automatically on beejartha node in prepare phase of next patching cycle.
adop exiting with status = 0 (Success)

Step 3: Run the Cleanup phase

As the applmgr user

unix>adop phase=cleanup cleanup_mode=full

Step 4: Start the patching cycle again with the prepare phase

Categories
ORACLE E-BUSINESS SUITE (EBS)

Install & Update the Support Analyzer Bundle Menu Tool

Introduction

Support Analyzers are various reports designed by Oracle Support to help diagnose issues in the Oracle E-Business Suite. These Analyzers can be
downloaded individually and executed as needed or when requested by Oracle Support. The Oracle E-Business Suite Support Analyzer Bundle Menu Tool contains many of these Analyzers as well as a menu interface for downloading, executing, installing, and updating them.

Below are examples of how to install, start, and update the Bundle Menu Tool on a Linux server

Install the Bundle Menu Tool

Step 1: Download the software

    • Log in to My Oracle Support
    • Open note E-Business Suite Support Analyzer Bundle Menu Tool (Doc ID 1939637.1).
    • Click on the Download button to download the software to your PC.
    • Note the file will be in this format: bundle_YYYY_MON_DD.zip

Step 2: Create a directory for the software on your server

    • As the applmgr user
    • unix> mkdir -p /opt/app/oracle/tools/EBS_Support_Analyzers

      unix> chmod -R 700 /opt/app/oracle/tools

Step 3: Upload the software to your server

    • Upload zip file to the directory you created in the previous step.
    • Use binary format to upload the file.

Step 4: Install software

    • As the applmgr user
    • unix> cd /opt/app/oracle/tools/EBS_Support_Analyzers

      unix> unzip bundle_YYYY_MON_DD.zip

Start the Bundle Menu Tool

Step 1: Source the Applications run environment

    • As the applmgr user
    • unix> . /opt/app/oracle/apps/EBSapps.env run

Step 2: Start the Bundle Menu Tool

    • As the applmgr user
    • unix> cd /opt/app/oracle/tools/EBS_Support_Analyzers/MENU

      unix> perl Menu.pl

Update Analyzers

Step 1: Source the Applications run environment

    • As the applmgr user
    • unix> . /opt/app/oracle/apps/EBSapps.env run

Step 2: Start the Bundle Menu Tool

    • As the applmgr user
    • unix> cd /opt/app/oracle/tools/EBS_Support_Analyzer/MENU

      unix> perl Menu.pl

Step 3: Update the Analyzers

    • Choose the following menu options

    • [U] Update, AutoUpdate, Uninstall
    • [2] Update Analyzer Bundle
    • You will see output similar to the following. Enter “D” to download the latest analyzers

    • INFO: No valid Bundle zip file was found in ‘MENU/update’
      Download now from Doc ID: 1939637.1?
      [D]ownload | [B]ack | [H]elp
      Selection: D
    • Enter your Oracle Support username and password

    • Enter your My Oracle Support username (e-mail):
      SSO Password: xxxxx
    • The download will begin and you will see output similar to the following. Hit ENTER when prompted

    • INFO: New Bundle download successful
      The latest Bundle is located at: ‘MENU/update/BUNDLE.01-Jan-2000-01_01_01.zip’
      Press [Enter] to continue:
      Press [Enter] to Continue:
      Menu.pl needs to be restarted using ‘perl Menu.pl’
      The update process will resume after the restart.

Step 4: Start the Bundle Menu Tool again to finish the installation

    • As the applmgr user
    • unix> perl Menu.pl

      If there are Analyzers installed as concurrent programs, you will see output similar to the following. You may update any or all programs or exit.

    • Update Concurrent Programs
      Legend: [+] = Selected To be Updated [Page 1 of 1]
      # SELECTED FAM: TITLE INSTALLED | NEW
      [1] [+] FIN: Receivables Receipt Analyzer 200.38 | 200.52
      [2] [+] FIN: Receivables Transaction Analyze… 200.43 | 200.56
      [L]oad | [B]ack | [H]elp | E[x]it

      Toggle Selections by Number
      Selection:
    • If there are no concurrent programs installed, you will see the following. Hit ENTER when prompted

    • INFO: Resuming Update. Press [Enter]:
      No Analyzer Concurrent Programs Installed
      Press [Enter] to Continue:
Categories
ORACLE E-BUSINESS SUITE (EBS)

Restricted PDBIssue

Introduction

Recently we were seeing a “credentials supplied are wrong” error when trying to start our Applications Tier. For example:


unix> $ADMIN_SCRIPTS_HOME/adstrtal.sh
You are running adstrtal.sh version 120.24.12020000.11
Enter the APPS username: apps
Enter the APPS password:
Enter the WebLogic Server password:
adstrtal.sh: Database connection could not be established. Either the database is down or the APPS credentials supplied are wrong.

Of course, we assumed the password was entered incorrectly but,after several attempts, we continued getting the same error.

We then tried to log in directly to our PDB as the APPS user by doing the following:


unix> source $ORACLE_HOME/DEVL_beejartha.env
unix>sqlplusapps@DEVL

And saw the following error:

ORA-01035 ORACLE only available to users with RESTRICTED SESSION privilege

Cause and Solution

In restricted mode, users without the necessary privileges cannot log in to the database (including the APPS user). Based on the error above, it appears our PDB had been started in restricted mode. This would explain the login issues we were experiencing.

We can confirm this by connecting to the PDB as SYSDBA and querying the V$INSTANCE view:


unix> source $ORACLE_HOME/DEVL_beejartha.env
unix> sqlplus sys@DEVL as sysdba
SQL> select logins from v$instance;

If the PDB is in restricted mode, you will see the following:


LOGINS
----------
RESTRICTED

To fix, simply disable by running the following statement:


SQL> alter system disable restricted session;

To confirm restricted session is disabled, you should see logins are “ALLOWED” when running the above query again:


SQL> select logins from v$instance;

LOGINS
----------
ALLOWED

After disabling restricted session, we were able to log in to the database as the APPS user as well as successfully starting the Applications Tier.

Note

It is possible for the PDB to be in restricted mode while the CDB is not. In other words, you can query the V$INSTANCE view in the CDB and see logins are “ALLOWED” but, when you query the PDB, logins are shown as “RESTRICTED”. Even though the CDB is open, you will still need to disable the restricted session in the PDB (as shown above).

Categories
ORACLE E-BUSINESS SUITE (EBS)

Running an Empty Patch Cycle

Introduction

If you would like to test the ADOP process with applying a patch, you can execute an empty patch cycle. You could also execute an empty patch cycle to switch between the fs1 and fs2 filesystems, again, without applying a patch.

Below is an example of executing a complete version of an empty patch cycle. Note the “actualize_all” phase will delete the old database editions.

Run an empty patch cycle

Step 1: Log in to your application server as the “applmgr” user

Step 2: Run an ADOP empty patch cycle

unix> source /opt/app/oracle/apps/EBSapps.env run
unix>adop phase=prepare
unix>adop phase=actualize_all
unix>adop phase=finalize finalize_mode=full
unix>adop phase=cutover
unix> source /opt/app/oracle/apps/EBSapps.env run
adop phase=cleanup cleanup_mode=full

When complete, if you check the status you will see output similar to the following:

==============================================================
ADOP (C.Delta.11)
Session Id: 91
Command: status
Output: /opt/app/oracle/apps/fs_ne/EBSapps/log/adop/91/20230101_190926/adzdshowstatus.out
===============================================================

Node Name Node Type Phase Status Started Finished Elapsed
beejartha master PREPARE COMPLETED 2023/01/0116:37:06 2023/01/01 16:42:29 0:05:23
APPLY COMPLETED
FINALIZE COMPLETED 2023/01/0117:16:17 2023/01/01 17:20:19 0:04:02
CUTOVER COMPLETED 2023/01/0117:24:09 2023/01/01 17:34:55 0:10:46
CLEANUP COMPLETED 2023/01/0117:36:54 2023/01/01 19:07:57 1:31:03
Categories
ORACLE E-BUSINESS SUITE (EBS)

Connect to WLS Administration Console with SSH Tunnelling

Introduction

If you apply the April 2019 Critical Patch Update or the Oracle E-Business Suite Technology Stack Delta 11 release update pack (R12.TXK.C.Delta.11), you will see a change in how you access the Oracle WebLogic Server Administration Console. To enhance security all access to the Console is configured to be denied by default. As a result, you can only connect to the Console from the application tier server. For example, if your Console is running on the “beeapps” server, you must log in to the “beeapps” server first and connect using a browser on that server.

Oracle does provide alternative methods of connecting to the Console from your desktop if you prefer. One alternative is using SSH tunneling and is discussed below.

In this example, we will be connecting to the Console running on our “beeapps” application server. Note, this example is assuming the run file system is fs1 and the Console is listening on port 7001. When the run file system is fs2, the Console is listening on port 7002.

Connect to the Console

Step 1: Establish an SSH Tunnel

In your Windows PC
Right-Click on the Start button
Choose the Run menu item

In the Run box, type cmd
Click the OK button

The command window will appear. Enter the following at the prompt to login to the “beeapps” server as the “applmgr” user:

C:\>sshapplmgr@beeapps -L localhost:7001:beeapps:7001

When prompted, enter the password for the APPLMGR user

You should see the following if you login successfully:

E-Business Suite Environment Information
—————————————-

C:\>RUN File System : /opt/app/oracle/apps/fs1/EBSapps/appl
PATCH File System : /opt/app/oracle/apps/fs2/EBSapps/appl
Non-Editioned File System : /opt/app/oracle/apps/fs_ne
DB Host: beedb.beejartha.com Service/SID: PROD
Sourcing the RUN File System ...
[applmgr@beeapps~]$

Step 2: Log in to the Console

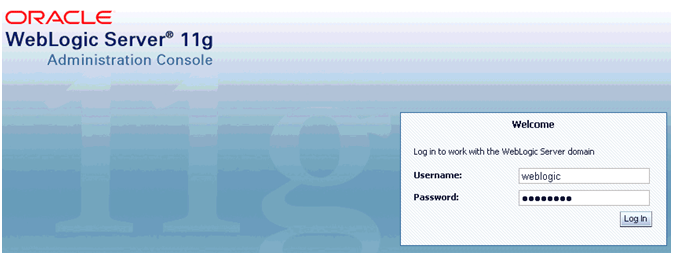
Now you can connect to the Console from your desktop. Open a browser and go to http://localhost:7001/console and you will see the login page:

Step 3: Log off and stop SSH Tunnel

When you are done using the Console do not forget to close the SSH Tunnel you created in the CMD window.