Beejartha

Categories
Oracle APEX

Integrating India’s UPI API with Oracle APEX: A Step-by-Step Guide

Unified Payments Interface (UPI) has revolutionized digital payments in India by offering a seamless and efficient way to conduct transactions. For businesses and developers using Oracle Application Express (APEX), integrating UPI can enhance your application by providing users with a convenient payment method. In this blog post, we’ll explore what UPI is, why it’s beneficial, and walk you through the process of integrating UPI with Oracle APEX.

What is UPI?

UPI is a real-time payment system developed by the National Payments Corporation of India (NPCI). It enables users to link multiple bank accounts to a single mobile application, facilitating quick and secure transactions. With UPI, users can make peer-to-peer payments, pay bills, and complete transactions with just a few clicks.

Benefits of UPI Integration

  1. Instant Transactions: UPI transactions are processed in real-time, making it ideal for quick payments.
  2. User-Friendly: UPI provides a simple and intuitive interface for users.
  3. Cost-Efficient: UPI transactions generally incur lower fees compared to traditional banking methods.
  4. Enhanced Security: UPI employs robust security measures to protect users’ financial information.

Integrating UPI with Oracle APEX

Oracle APEX is a powerful low-code development platform that simplifies the creation of web applications.

Integrating UPI into your Oracle APEX application involves several steps, including setting up a payment gateway, configuring web services, and handling payment responses. Let’s walk through the integration process.

Step 1: Choose a UPI Service Provider

To integrate UPI, you’ll need to use a payment gateway provider that supports UPI transactions. Popular options include Razorpay, Paytm, and PhonePe. For this guide, we’ll use Razorpay. Sign up for an account with Razorpay and obtain your API key and secret.

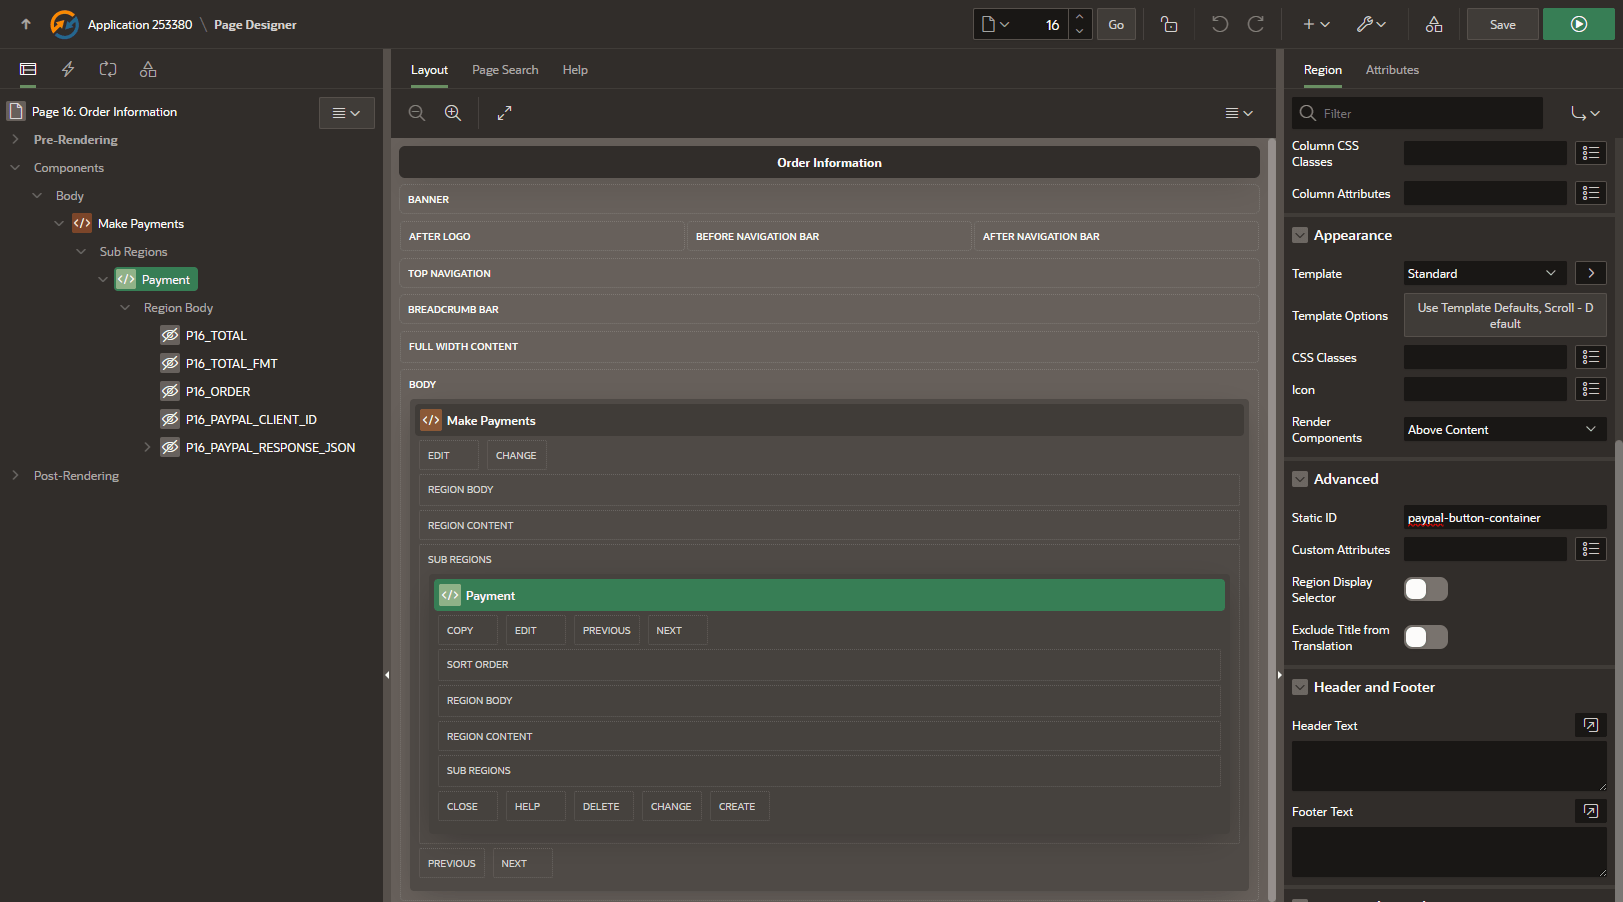
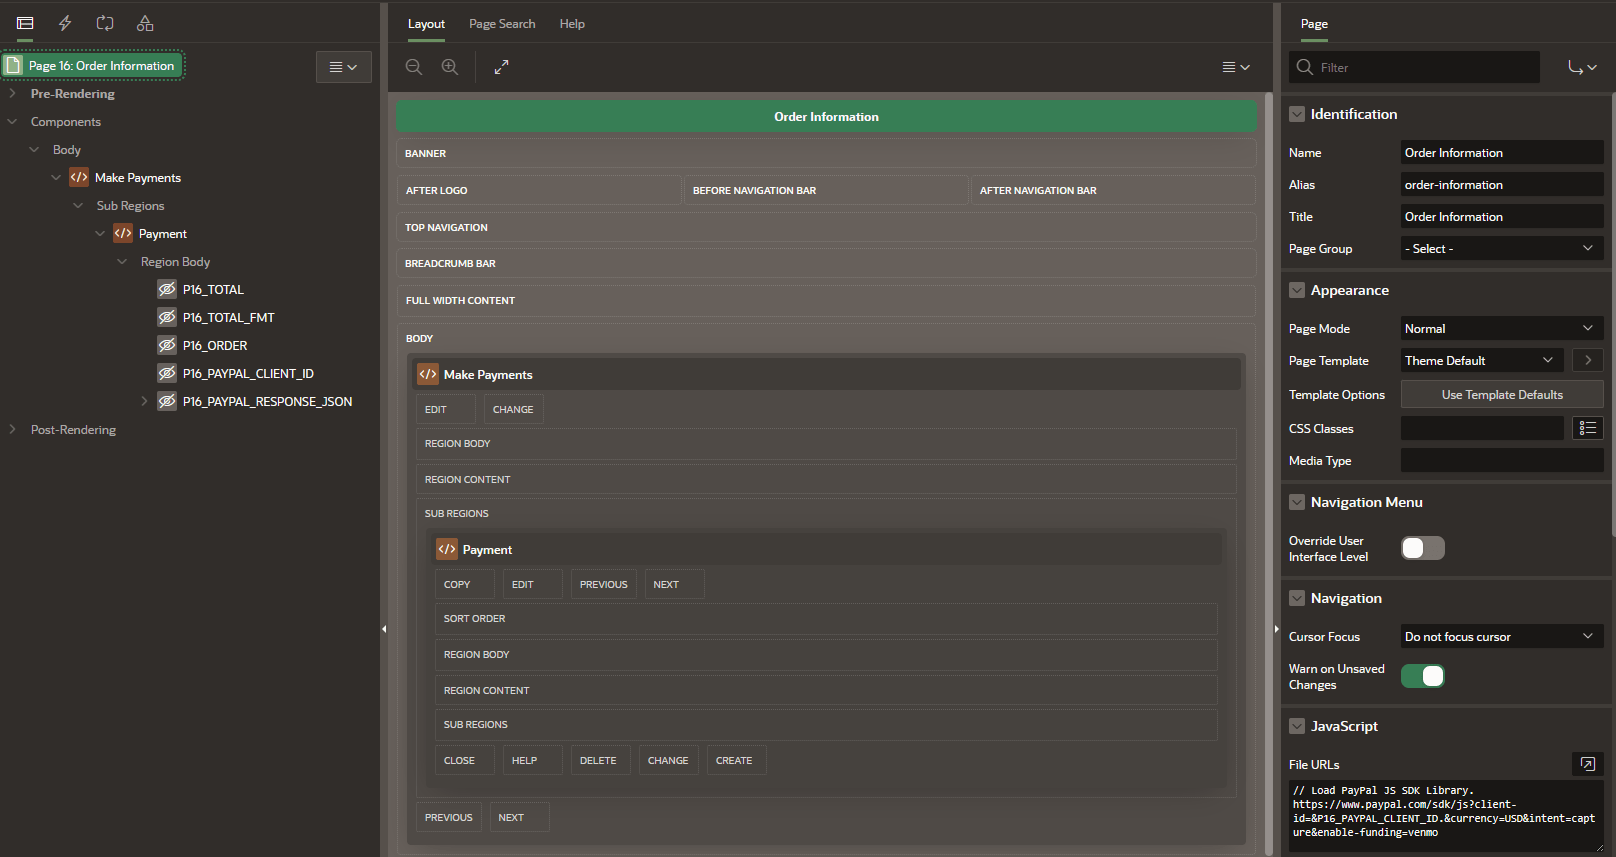
Step 2: Set Up Web Services in Oracle APEX

  • Login to Oracle APEX: Access your Oracle APEX workspace and navigate to the application where you want to integrate UPI.
  • Create a Web Service:
    • Go to the “SQL Workshop” section.
    • Select “RESTful Web Services” and create a new RESTful Web Service.
  • Define the Web Service:
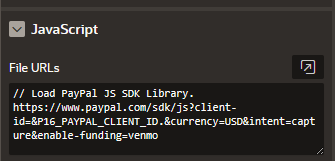
    • Set the “Base URL” to the endpoint provided by your payment gateway (e.g., Razorpay’s API endpoint).
    • Configure the HTTP methods (GET, POST, etc.) based on the API documentation provided by your payment gateway.
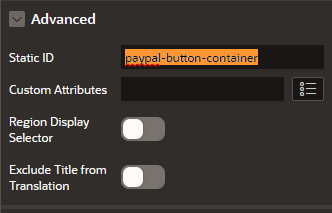
  • Authentication:
    • Implement authentication using the API key and secret provided by your payment gateway.
    • Use the “Web Credentials” feature in APEX to securely store your credentials.

Step 3: Create an API Integration

  1. Create a New PL/SQL Process:
    • Go to “App Builder” and select the page where you want to add UPI payment functionality.
    • Create a new PL/SQL process to handle the payment request.
  2. Set Up the Payment Request:
      • Use the PL/SQL code to call the payment gateway’s API. Here’s an example using Razorpay’s API to create an order:


    DECLARE
    l_order_response clob;
    l_http_request uow_request;
    l_http_response uow_response;
    l_url varchar2(32767);
    BEGIN
    l_url := 'https://api.razorpay.com/v1/orders';
    l_http_request := utl_http.begin_request(l_url, 'POST', 'HTTP/1.1');
    utl_http.set_header(l_http_request, 'Content-Type', 'application/json');
    utl_http.set_authentication(l_http_request, 'YOUR_RAZORPAY_KEY_ID', 'YOUR_RAZORPAY_KEY_SECRET');
    utl_http.write_text(l_http_request, '{"amount":50000,"currency":"INR","payment_capture":1}');
    l_http_response := utl_http.get_response(l_http_request);
    l_order_response := utl_http.get_text(l_http_response);
    dbms_output.put_line(l_order_response);
    utl_http.end_response(l_http_response);
    END;

    • Replace YOUR_RAZORPAY_KEY_ID and YOUR_RAZORPAY_KEY_SECRET with your actual credentials.
    • Handle the Response:
      • Parse the response from the payment gateway to extract necessary details such as order ID and payment link.
      • Display the payment link or redirect users to complete the transaction.

Step 4: Implement Payment Confirmation

  1. Create a Callback Page:
    • Set up a page to handle payment confirmations. This page will receive payment status from the payment gateway.
  2. Handle Payment Status:
    • Implement a process to verify the payment status using the details sent by the payment gateway. For example:


DECLARE
l_payment_id varchar2(255);
l_payment_status varchar2(255);
BEGIN
-- Extract payment ID and status from the request
l_payment_id := :P1_PAYMENT_ID;
l_payment_status := :P1_PAYMENT_STATUS;
-- Verify payment status (implementation depends on gateway API)
IF l_payment_status = 'success' THEN
-- Update order status or perform necessary actions
dbms_output.put_line('Payment successful!');
ELSE
dbms_output.put_line('Payment failed.');
END IF;
END;

  1. Configure Webhooks (Optional):

Some payment gateways offer webhooks to notify your application of payment events. Configure webhooks as per the gateway’s documentation to automatically handle payment updates.

Step 5: Test and Deploy

  1. Testing:
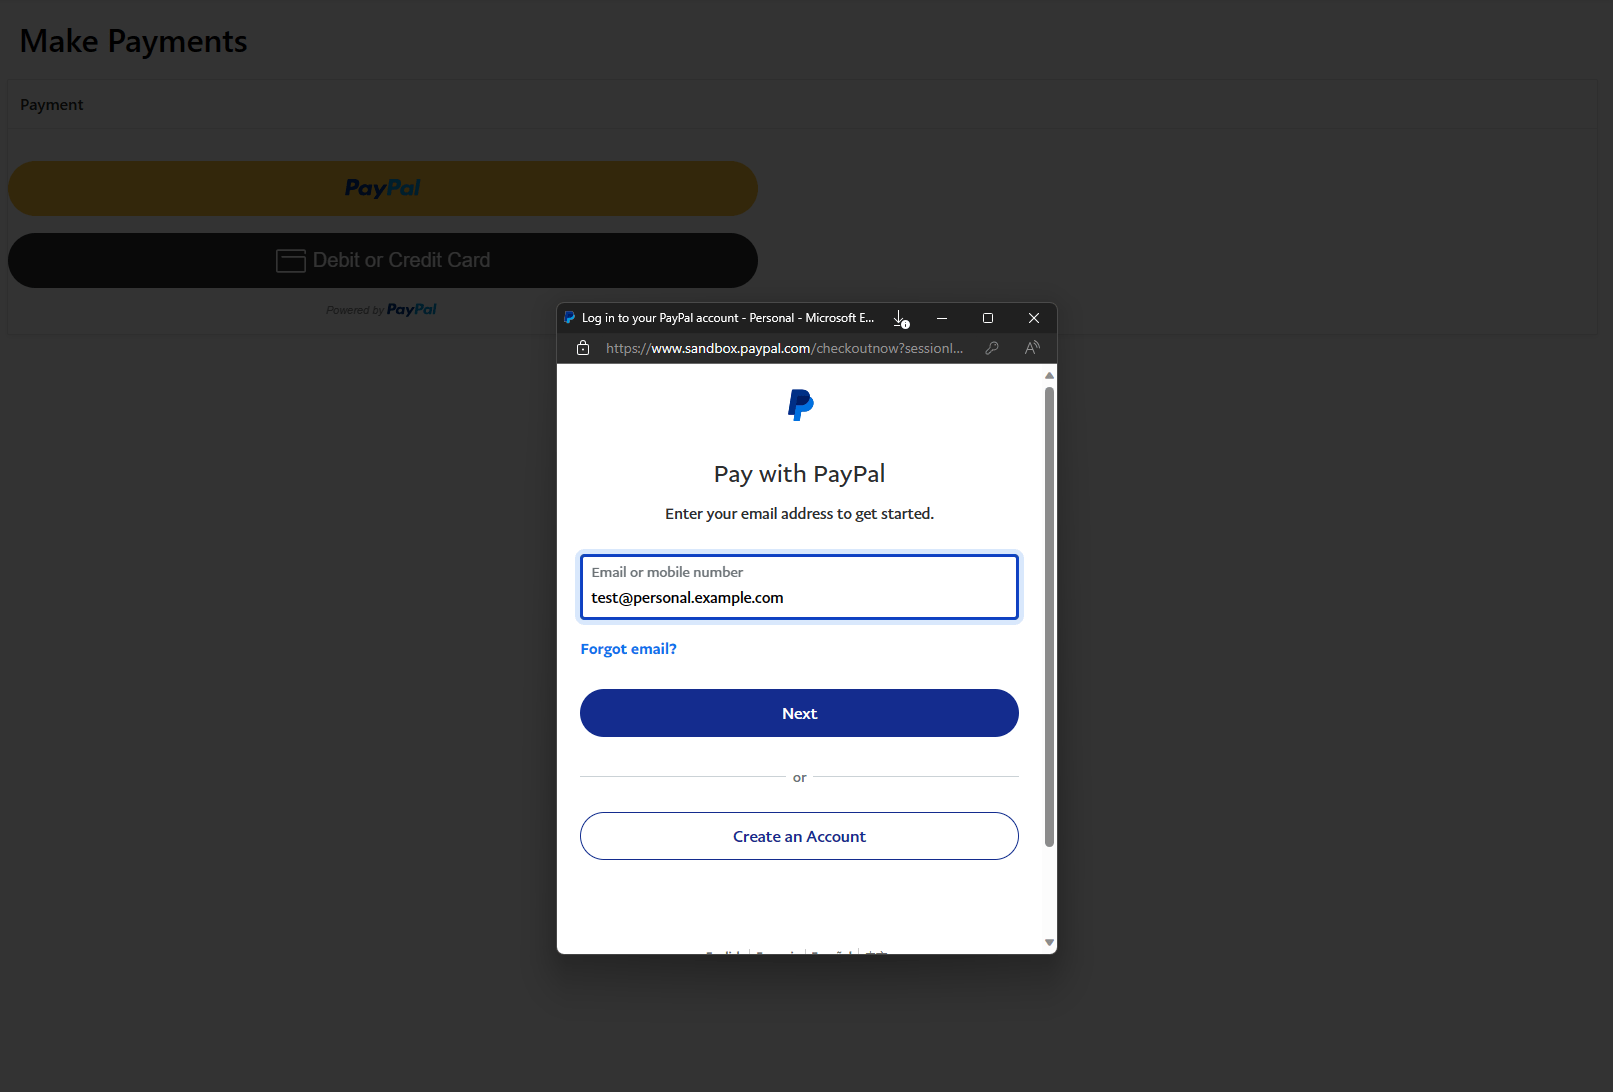
    • Test the integration thoroughly using the payment gateway’s sandbox environment. Ensure that all scenarios (e.g., successful payments, failed payments) are handled correctly.
  2. Deployment:
    • After successful testing, deploy your application to the production environment. Switch to live credentials and monitor transactions to ensure smooth operation.

Conclusion

Integrating UPI with Oracle APEX can significantly enhance your application’s payment capabilities, offering a convenient and secure option for users. By following the steps outlined in this guide, you can successfully integrate UPI into your APEX application, enabling real-time payments and improving user experience.

If you have any questions or need further assistance, feel free to leave a comment below. Happy integrating, and may your UPI implementation be smooth and successful!

Categories
Node & React Js

Integrating India’s UPI API with Node.js: A Comprehensive Guide

In the ever-evolving landscape of digital payments, India’s Unified Payments Interface (UPI) stands out as a revolutionary system. Launched by the National Payments Corporation of India (NPCI), UPI has transformed the way transactions are conducted in India, providing a seamless and secure platform for both users and businesses.

For developers and businesses looking to leverage UPI for payment processing, integrating UPI with your application can open doors to a vast market. In this blog post, we’ll explore what UPI is, and guide you through the process of integrating UPI with a Node.js application using the UPI API.

What is UPI?

UPI is a real-time payment system that facilitates instant money transfers between banks through mobile devices. It simplifies transactions by linking multiple bank accounts to a single mobile application and allows for easy and quick payments with just a few taps. UPI supports a range of transactions including bill payments, peer-to-peer transfers, and merchant payments.

Benefits of UPI Integration

  1. Seamless Transactions: UPI transactions are instantaneous and can be completed 24/7, including on holidays.
  2. Cost-Effective: UPI transactions typically incur lower costs compared to traditional banking methods.
  3. User-Friendly: UPI provides a straightforward and easy-to-use interface for users, enhancing their overall experience.
  4. Security: UPI transactions are encrypted and include multiple layers of security to protect users.

Integrating UPI with Node.js

To integrate UPI with a Node.js application, you’ll need to follow these steps:

Step 1: Set Up Your Development Environment

Before starting the integration process, ensure you have Node.js and npm (Node Package Manager) installed. If not, download and install them from the official Node.js website.

Step 2: Choose a UPI Service Provider

UPI integration is typically done through third-party service providers or payment gateways that offer UPI services. Some popular providers include Razorpay, Paytm, and PhonePe. For this guide, we’ll use Razorpay as an example. Sign up for a Razorpay account and obtain your API key and secret.

Step 3: Install Necessary Packages

First, create a new Node.js project or navigate to your existing project directory. Install the razorpay package using npm:

npm install razorpay

Step 4: Initialize Razorpay in Your Node.js Application

Create a new file, upi Integration.js, and initialize Razorpay with your API credentials:

const Razorpay = require('razorpay');
const razorpay = new Razorpay({
key_id: 'YOUR_RAZORPAY_KEY_ID',
key_secret: 'YOUR_RAZORPAY_KEY_SECRET',
});

Step 5: Create a Payment Order

To initiate a UPI payment, you need to create a payment order. This involves specifying the amount, currency, and payment method. Here’s an example of how to create an order:

const createOrder = async () => {
try {
const order = await razorpay.orders.create({
amount: 50000, // Amount in paise (50000 paise = ₹500)
currency: 'INR',
payment_capture: 1, // 1 to capture payment automatically, 0 otherwise
});
return order;
} catch (error) {
console.error('Error creating order:', error);
throw error;
}
};
createOrder().then(order => {
console.log('Order created:', order);
});

Step 6: Implement UPI Payment Gateway

Once the order is created, you need to redirect the user to the UPI payment gateway. This step involves using Razorpay’s payment link or integrating their frontend SDK. Here’s a basic example of how you might create a payment link:

const generatePaymentLink = async (orderId) => {
const paymentLink = `https://api.razorpay.com/v1/checkout/1?order_id=${orderId}`;
return paymentLink;
};
createOrder().then(order => {
generatePaymentLink(order.id).then(link => {
console.log('Payment link:', link);
});
});

Step 7: Handle Payment Confirmation

After the user completes the payment, Razorpay will send a callback to your server with payment details. Implement a webhook to handle payment confirmation:

const express = require('express');
const bodyParser = require('body-parser');
const crypto = require('crypto');
const app = express();
app.use(bodyParser.json());
const webhookSecret = 'YOUR_WEBHOOK_SECRET';
app.post('/webhook', (req, res) => {
const hmac = crypto.createHmac('sha256', webhookSecret);
const sig = hmac.update(JSON.stringify(req.body)).digest('hex');
if (sig === req.headers['x-razorpay-signature']) {
// Payment verified
console.log('Payment details:', req.body);
res.status(200).send('Success');
} else {
// Payment verification failed
res.status(400).send('Invalid signature');
}
});
app.listen(3000, () => {
console.log('Server running on port 3000');
});

Step 8: Testing and Deployment

Thoroughly test your UPI integration using Razorpay’s test mode or sandbox environment. Ensure that you handle different payment scenarios, such as successful payments, failed payments, and refunds.
Once testing is complete, deploy your application to a production environment and switch to Razorpay’s live credentials.

Conclusion

Integrating UPI with your Node.js application can significantly enhance the payment experience for your users. By leveraging UPI’s seamless and secure transaction capabilities, you can streamline payment processes and tap into India’s vast market. With the steps outlined in this guide, you should be well on your way to implementing UPI in your Node.js application.

Happy coding and may your payment integration be smooth and successful! If you have any questions or run into issues, feel free to ask in the comments below.

Categories
Node & React Js

Security Best Practices for Node.js Applications

Node.js is widely used for developing web applications because of its efficiency and scalability. As its popularity increases, it is important to prioritize security measures to safeguard applications from potential risks. Below are key recommendations for enhancing the security of Node.js applications:

Input Validation

It is crucial to consistently verify user input in order to safeguard your application against harmful data that may result in security risks like SQL injection, cross-site scripting (XSS), and remote code execution. Employ reliable validation tools such as `express-validator` to assess the type, length, format, and scope of input data

Authentication

Implement robust authentication mechanisms. Explore the utilization of OAuth or JSON Web Tokens (JWT) for stateless authentication. Guarantee the secure storage of passwords by employing salted hashing algorithms such as bcrypt.

Authorization

Implement stringent authorization checks to guarantee that users can only access resources for which they have explicit permission. Employ middleware to effectively handle roles and permissions, and refrain from solely relying on client-side checks.

Security Headers

Enhance security by leveraging HTTP headers. Utilize tools such as Helmet to configure different HTTP headers in order to safeguard against threats like clickjacking, XSS, and other forms of code injection attacks.

Dependency Management

Ensure that all dependencies are kept up to date and conduct regular checks for vulnerabilities by utilizing tools such as npm audit or Snyk. Eliminate any unused dependencies in order to minimize the attack surface.

Session Management

Utilize secure, HTTP-only cookies for managing sessions in order to mitigate XSS attacks. Ensure appropriate session expiration settings and explore the option of employing session stores that are resilient against session fixation.

Error Handling

Ensure errors are managed appropriately by avoiding the disclosure of stack traces or confidential application information to users. Utilize logging frameworks to document errors for tracking purposes, all the while presenting users with generic error notifications.

Rate Limiting

Implement rate limiting on vulnerable routes, such as login routes, to safeguard your application from brute-force attacks.

Data Protection

Sensitive data should be encrypted during transmission by utilizing TLS and while at rest by employing suitable encryption techniques. It is crucial to ensure that backups are also encrypted to maintain the security of the information.

Logging and Monitoring

Utilize logging to document user actions and system events. Employ monitoring tools to detect any abnormal activities that may signal a security breach.

Protection Against Common Vulnerabilities

Stay informed about prevalent security weaknesses outlined by OWASP, including injection attacks, broken authentication, exposure of sensitive data, and others. Consistently assess and evaluate your application to identify and address these vulnerabilities.

Conclusion

Adhering to these security guidelines can greatly minimize the chances of vulnerabilities in Node.js applications and safeguard valuable data and assets. It is crucial to stay updated on the newest security risks and consistently incorporate security measures throughout the development process.

Categories
Node & React Js

Harnessing the Power of NoSQL Databases in Node.js Applications

In the constantly changing realm of database technologies, NoSQL databases have risen as robust substitutes for conventional relational databases, providing unmatched scalability, adaptability, and efficiency. This extensive manual will delve into how Node.js developers can utilize NoSQL databases such as MongoDB and Redis to create high-performing applications. We will discuss a wide range of topics, from fundamental CRUD operations to sophisticated data modeling and techniques for optimizing performance.

Understanding NoSQL Databases

NoSQL databases are specifically crafted to manage extensive amounts of unstructured or semi-structured data, which makes them perfect for contemporary web applications that handle various data formats and high-throughput tasks. In contrast to relational databases that utilize structured query language (SQL) for data handling, NoSQL databases utilize adaptable data models and query languages customized for particular scenarios.

Choosing the Right NoSQL Database

Various NoSQL databases are available, each tailored for specific data storage and retrieval needs. The top two types include document-oriented databases such as MongoDB and key-value stores like Redis. When selecting a NoSQL database for your Node.js application, take into account factors like data organization, query intricacy, scalability demands, and consistency assurances.

Working with MongoDB in Node.js

MongoDB is a popular NoSQL database that utilizes a document-oriented approach, offering a flexible data model, powerful query features, and the ability to scale horizontally. When working with MongoDB in Node.js applications, developers commonly rely on the official MongoDB Node.js driver or well-known Object-Document Mapping (ODM) libraries such as Mongoose.

This section will delve into:

  • Connecting to a MongoDB database from a Node.js application.
  • Performing CRUD (Create, Read, Update, Delete) operations on MongoDB collections.
  • Defining schemas and models using Mongoose for data validation and abstraction.
  • Executing complex queries using MongoDB’s aggregation framework
  • Best practices for indexing, sharding, and optimizing MongoDB performance

Working with Redis in Node.js

Redis is a high-speed in-memory key-value store recognized for its exceptional performance, data structures, and ability to support advanced functionalities such as pub/sub messaging and caching. When working with Node.js applications, developers have the option to engage with Redis through the official Redis client or through high-level libraries like in redis.

In this segment, we will discuss:

  • Establishing a connection to a Redis server from a Node.js application.
  • Executing fundamental operations like SET, GET, and DEL for key-value storage.
  • Utilizing Redis data structures such as lists, sets, and hashes for sophisticated data manipulation.
  • Implementing caching techniques with Redis to enhance application performance.
  • Harnessing Redis pub/sub messaging for instantaneous communication among components.

Data Modeling and Performance Optimization

Effective data modeling is crucial for maximizing the performance and scalability of No SQL databases in Node.js applications. In this section, we’ll discuss strategies for designing schemas, denormalizing data, and optimizing queries to achieve optimal performance. Key topics include:

  • Designing efficient document schemas for MongoDB collections
  • Denormalizing data to reduce query complexity and improve read performance.
  • Implementing indexing and query optimization techniques for both MongoDB and Redis.
  • Utilizing caching and data partitioning strategies to distribute load and improve scalability

Conclusion

NoSQL databases such as MongoDB and Redis provide Node.js developers with a robust toolkit to create high-performance, scalable, and adaptable applications. By mastering the basics of NoSQL databases, including CRUD operations, data modeling, and performance optimization strategies, developers can fully utilize these technologies to deliver efficient and reliable solutions that cater to the requirements of modern web applications.

In essence, integrating NoSQL databases into Node.js applications unlocks a plethora of opportunities for constructing data-centric, real-time, and scalable systems. Whether you are developing a social networking platform, an online store, or a live analytics dashboard, NoSQL databases offer the versatility and efficiency necessary to excel in today’s dynamic digital environment.

Categories
Node & React Js

Mastering Deployment Strategies for Node.js Applications

In the rapidly evolving realm of software development, ensuring efficient and dependable deployment of Node.js applications in production environments is crucial for achieving success. With a multitude of deployment options at hand, selecting the most suitable strategy can be overwhelming. Within this extensive guide, we will delve into diverse deployment strategies for Node.js applications, encompassing containerization through Docker, deployment on cloud platforms such as AWS and Heroku, and the implementation of continuous integration/continuous deployment (CI/CD) pipelines

Understanding Deployment Strategies

Before diving into specific deployment methods, let’s briefly discuss the goals and considerations of deploying Node.js applications. The primary objectives include:

  1. Reliability: Ensuring that deployed applications are stable, performant, and resilient to failures.
  2. Scalability: Ability to scale applications horizontally or vertically to handle increased traffic and load.
  3. Automation: Streamlining deployment processes to minimize manual intervention and human error
  4. Maintainability: Simplifying maintenance tasks such as updates, rollbacks, and monitoring.

With these goals in mind, let’s explore the deployment strategies available for Node.js applications.

Containerization with Docker

Containerization has revolutionized software deployment by packaging applications and their dependencies into lightweight, portable containers. Docker, the leading containerization platform, offers several benefits for deploying Node.js applications:

  1. Consistency: Docker ensures consistent environments across development, testing, and production, reducing the risk of “it works on my machine” issues.
  2. Isolation: Containers provide isolation for applications, preventing conflicts between dependencies and allowing for easy versioning
  3. Automation: Docker enables easy scaling of Node.js applications using container orchestration tools like Kubernetes or Docker Swarm

To deploy a Node.js application with Docker, developers create a Dockerfile specifying the application’s dependencies and runtime environment. They then build a Docker image and deploy it to a container orchestration platform or a Docker host.

Deployment to Cloud Platforms

Cloud platforms such as AWS (Amazon Web Services) and Heroku offer convenient and scalable environments for deploying Node.js applications. Key benefits of deploying to cloud platforms include:

  1. Infrastructure Management: Cloud platforms abstract away infrastructure management tasks, allowing developers to focus on application development.
  2. Scalability: Cloud platforms provide auto-scaling capabilities, ensuring applications can handle fluctuating traffic and load.
  3. Managed Services: Cloud platforms offer a wide range of managed services, including databases, caching, and monitoring, simplifying application development and maintenance.

To deploy a Node.js application to AWS, developers can use services like AWS Elastic Beanstalk, AWS Lambda, or EC2 instances. Similarly, deploying to Heroku involves pushing code to a Git repository and letting Heroku handle the rest, including building, deploying, and scaling the application.

Continuous Integration/Continuous Deployment (CI/CD) Pipelines

CI/CD pipelines automate the process of building, testing, and deploying applications, enabling rapid and reliable releases. By integrating CI/CD into the development workflow, developers can:

  1. Automate Deployment: CI/CD pipelines automate the deployment process, reducing manual intervention and human error.
  2. Ensure Consistency: CI/CD pipelines ensure consistent deployment environments and configurations across development, testing, and production
  3. Enable Continuous Delivery: CI/CD pipelines enable continuous delivery, allowing developers to release updates to production quickly and frequently.

Popular CI/CD tools such as Jenkins, CircleCI, and GitLab CI/CD integrate seamlessly with Node.js applications. Developers define pipeline configurations specifying build, test, and deployment stages, and the CI/CD tool executes these stages automatically whenever changes are pushed to the code repository.

Conclusion

Deploying Node.js applications in production environments necessitates thorough planning and consideration of various factors like reliability, scalability, automation, and maintainability. Utilizing deployment techniques such as Docker containerization, cloud platform deployment on AWS and Heroku, and CI/CD pipelines, developers can simplify the deployment process, reduce downtime, and efficiently deliver top-notch applications to users.

In essence, mastering deployment strategies for Node.js applications is crucial for contemporary software development practices, empowering developers to swiftly, reliably, and extensively deploy applications. Whether opting for Docker, cloud platforms, CI/CD pipelines, or a blend of these methods, the key lies in emphasizing automation, consistency, and scalability to guarantee successful deployments and contented end-users.

Categories
Javascript

Navigating Asynchronous JavaScript: Promises, Async/Await, and Generators

Asynchronous code is a common feature of modern JavaScript applications, especially when dealing with network requests, timers, events, and callbacks. However, writing and managing asynchronous code can be challenging, as it often involves nested callbacks, complex error handling, and code that is hard to read and maintain. Fortunately, JavaScript offers some powerful tools to simplify and streamline asynchronous code, such as promises, async/await, and generators. In this blog post, we will explore how to use these tools to write clean, concise, and elegant asynchronous code.

Promises: Bridging the Asynchronous Chasm

A promise is an object that represents the eventual completion or failure of an asynchronous operation. A promise can be in one of three states: pending (the operation is still in progress), fulfilled (the operation succeeded and has a value), or rejected (the operation failed and has a reason). A promise can be created using the new Promise constructor, which takes a function (called the executor) as an argument. The executor function receives two parameters: resolve and reject, which are functions that can be used to settle the promise.


const fetchData = () => {
return new Promise((resolve, reject) => {
// Simulate asynchronous operation
setTimeout(() => {
const data = { message: "Data fetched successfully" };
resolve(data);
}, 2000);
});
};
fetchData()
.then((data) => {
console.log(data);
})
.catch((error) => {
console.error(error);
});

In this example, the fetchData function returns a promise, which resolves with data after a simulated delay. By chaining .then and .catch handlers, developers can respond to successful completions or handle errors gracefully.

Async/Await: Asynchronous Flows

Async/await, introduced in ECMAScript 2017, offers a more concise and readable syntax for asynchronous programming. By marking functions as async and using the await keyword within them, developers can write asynchronous code that resembles synchronous code, enhancing code clarity and maintainability.


const fetchData = async () => {
try {
const response = await fetch("https://api.example.com/data");
const data = await response.json();
console.log(data);
} catch (error) {
console.error(error);
}
};
fetchData();

In this example, the fetchData function uses async/await to fetch data from an API asynchronously. The await keyword pauses the execution of the function until the promise returned by fetch resolves, simplifying the handling of asynchronous flows.

Generators: Pausing and Resuming Asynchronous Iterations

Generators provide a unique mechanism for creating iterable sequences with the ability to pause and resume execution at arbitrary points. While primarily used for synchronous operations, generators can also facilitate asynchronous workflows when combined with promises or async/await.


function* fetchGenerator() {
try {
const response = yield fetch("https://api.example.com/data");
const data = yield response.json();
console.log(data);
} catch (error) {
console.error(error);
}
}
const iterator = fetchGenerator();
const promise = iterator.next().value;
promise
.then((response) => iterator.next(response))
.then((data) => iterator.next(data))
.catch((error) => iterator.throw(error));

In this example, the fetchGenerator function creates a generator that fetches data from an API in a step-by-step manner. By yielding promises and handling their resolutions, developers can orchestrate asynchronous operations within the generator.

Conclusion: Harnessing the Power of Asynchronous JavaScript

In conclusion, promises, async/await, and generators represent invaluable tools for managing asynchronous code in JavaScript. Whether it’s handling asynchronous operations, orchestrating complex workflows, or improving code readability, these constructs empower developers to navigate the asynchronous landscape with confidence and efficiency. By mastering these asynchronous techniques, developers can unlock the full potential of JavaScript and build robust, responsive applications that meet the demands of modern web development.

Categories
Javascript

Mastering JavaScript Essentials: Functions, Loops, Arrays, and Objects

In this blog post, I will explain how to write and use functions, loops, arrays, and objects in JavaScript. These are some of the most important and common features of the language that every developer should know.

Functions: Building Blocks of Reusability

Functions are blocks of code that can be defined once and executed multiple times with different arguments. They allow us to reuse code and avoid repetition. To define a function, we use the keyword function followed by the name of the function, a list of parameters in parentheses, and a block of code in curly braces. For example:


function add(a, b) {
return a + b;
}

This function takes two arguments, a and b, and returns their sum. To call or invoke a function, we use the name of the function followed by a list of arguments in parentheses. For example:


let result = add(3, 5); // result is 8

We can also assign functions to variables or pass them as arguments to other functions. This is possible because functions are first-class objects in JavaScript, meaning they can be treated like
any other value.

Loops: Iterative Enablers

Loops are structures that allow us to execute a block of code repeatedly until a certain condition is met. They are useful for iterating over arrays, objects, or any other collection of data. There are several types of loops in JavaScript, such as for, while, do-while, and for-of. For example:


let numbers = [1, 2, 3, 4, 5];
for (let i = 0; i < numbers.length; i++) { console.log(numbers[i]); // prints each element of the array }

This for loop uses a variable i to keep track of the index of the current element in the array. It starts from 0 and increments by 1 until it reaches the length of the array. The condition i < numbers.length determines when the loop should stop. The block of code inside the curly braces is executed for each iteration of the loop.

Arrays: Versatile Data Containers

Arrays are ordered collections of values that can be accessed by their index. They are one of the most widely used data structures in JavaScript. To create an array, we use square brackets and separate the elements by commas. For example:


let fruits = ["apple", "banana", "orange"];

This array has three elements: "apple" at index 0, "banana" at index 1, and "orange" at index 2. To access an element of an array, we use the name of the array followed by the index in square brackets. For example:


let first = fruits[0]; // first is "apple"

We can also modify or add elements to an array using the same syntax. For example:


fruits[1] = "pear"; // changes "banana" to "pear"
fruits[3] = "grape"; // adds "grape" at index 3

Arrays have many built-in methods that allow us to manipulate them in various ways, such as push, pop, slice, splice, map, filter, reduce, and more.

Objects: Key-Value Harmonizers

Objects are unordered collections of key-value pairs that can be used to store and organize data. They are also one of the most common data structures in JavaScript. To create an object, we use curly braces and separate the key-value pairs by commas. For example:


let person = {
name: "Alice",
age: 25,
hobbies: ["reading", "writing", "coding"]
};

This object has three properties: name with value "Alice", age with value 25, and hobbies with value ["reading", "writing", "coding"]. To access a property of an object, we use the name of the object followed by a dot and the name of the property. For example:


let name = person.name; // name is "Alice"

We can also use square brackets and pass the name of the property as a string. This is useful when the property name is stored in a variable or contains special characters. For example:


let key = "age";
let age = person[key]; // age is 25

We can also modify or add properties to an object using the same syntax. For example:


person.age = 26; // changes age to 26
person.gender = "female"; // adds gender with value "female

Objects have many built-in methods that allow us to manipulate them in various ways, such as keys, values, entries, assign, freeze, seal, and more.

I hope this blog post has helped you understand how to write and use functions, loops, arrays, and objects in JavaScript. These are some of the most essential skills for any JavaScript developer. By mastering these fundamental constructs, developers can build robust and scalable web applications, leverage the full potential of JavaScript, and contribute to the ever-evolving landscape of web development. Whether it's implementing business logic, processing data, or managing complex data structures, a solid understanding of these essentials is essential for achieving success in JavaScript development.

Happy coding!

Categories
Javascript

Utilizing JSON and localStorage for Data Storage and Exchange

JSON (JavaScript Object Notation) is a lightweight and human readable data format that is widely used for data interchange on the web. JSON can represent simple values, such as strings, numbers, booleans, and null, as well as complex values, such as arrays and objects.
localStorage is a web storage mechanism that allows JavaScript sites and apps to save key-value pairs in the browser, with no expiration date. This means that the data persists even after the user closes the browser or restarts the computer. localStorage can store up to 5 MB of data per domain, and it is only accessible to the origin that created it.
In this blog post, we will show you how to use JSON and localStorage to store and exchange data in JavaScript. We will cover the following topics:

  • How to store data in localStorage using JSON.stringify()
  • How to retrieve data from localStorage using JSON.parse()
  • How to update and delete data in localStorage
  • How to use localStorage events to synchronize data across tabs or windows.
How to store data in localStorage using JSON.stringify()

To store data in localStorage, we need to use the localStorage.setItem() method, which takes two parameters: a key and a value. The key is a string that identifies the data, and the value is the data that we want to store.

However, localStorage can only store strings, so if we want to store complex values, such as arrays or objects, we need to convert them into strings first. This is where JSON.stringify() comes in handy. JSON.stringify() is a built-in function that takes a JavaScript value and returns a JSON formatted string.

For example, suppose we have an array of objects that represents some products, like this:


var products = [
{name: "Laptop", price: 1000, category: "Electronics"},
{name: "Book", price: 20, category: "Books"},
{name: "Shoes", price: 50, category: "Clothing"}
];

To store this array in localStorage, we can use JSON.stringify() to convert it into a string, and then
use localStorage.setItem() to save it under the key “products”, like this:


var productsString = JSON.stringify(products); // convert the array into a JSON
string
localStorage.setItem("products", productsString); // store the string in
localStorage

Now, the data is stored in localStorage, and we can see it in the browser’s devtools, under the
Application tab.

How to retrieve data from localStorage using JSON.parse()

To retrieve data from localStorage, we need to use the localStorage.getItem() method, which takes one parameter: a key. The key is a string that identifies the data that we want to retrieve. The method returns the value associated with the key, or null if the key does not exist.

However, localStorage returns the value as a string, so if we want to use the value as a JavaScript
value, such as an array or an object, we need to convert it back from a string first. This is where
JSON.parse() comes in handy. JSON.parse() is a built-in function that takes a JSON-formatted string and returns a JavaScript value.

For example, suppose we want to retrieve the array of products that we stored in localStorage in the previous section. We can use localStorage.getItem() to get the string value, and then use JSON.parse() to convert it into an array, like this:


var productsString = localStorage.getItem("products"); // get the string value
from localStorage
var products = JSON.parse(productsString); // convert the string into an array

How to update and delete data in localStorage

To update data in localStorage, we can use the localStorage.setItem() method again, with the same key and a new value. The method will overwrite the existing value with the new value.

For example, suppose we want to update the price of the laptop product to 900. We can do this by modifying the products array, converting it into a string, and storing it in localStorage again, like
this:


products[0].price = 900; // modify the price of the first product in the array
var productsString = JSON.stringify(products); // convert the array into a JSON
string
localStorage.setItem("products", productsString); // store the string in
localStorage

To delete data from localStorage, we can use the localStorage.removeItem() method, which takes
one parameter: a key. The key is a string that identifies the data that we want to delete. The method
will remove the key and its value from localStorage.

For example, suppose we want to delete the book product from localStorage. We can do this by removing the second element from the products array, converting it into a string, and storing it in localStorage again, like this:


products.splice(1, 1); // remove the second element from the array
var productsString = JSON.stringify(products); // convert the array into a JSON
string
localStorage.setItem("products", productsString); // store the string in
localStorage

In this blog post, we have learned how to use JSON and localStorage to store and exchange data in JavaScript. We have seen how to use JSON.stringify() and JSON.parse() to convert JavaScript values into JSON strings and vice versa. We have also seen how to use localStorage.setItem(), localStorage.getItem(), localStorage.removeItem(), and localStorage.clear() to store, retrieve, update, and delete data in localStorage.We hope you have found this blog post useful and informative. If you have any questions or feedback, please leave a comment below. Happy coding

Categories
Javascript

How to use the console, debugger, and other tools to debug javascript code

Debugging JavaScript code is essential for identifying and fixing errors. Whether you’re a seasoned
developer or just starting out, you’ll likely encounter bugs in your code. Debugging helps you
locate and resolve these issues.

What Is Debugging?

Debugging involves searching for and fixing errors in your code. Even if your JavaScript code is syntactically correct, logical errors can still occur, especially in complex applications. Unfortunately, these errors often don’t provide clear error messages or clues about their location.

You need to force your code to stop running at specific points to debug effectively. You can achieve this by setting breakpoints. Once the code is paused, you can inspect variables, check function calls, and identify what’s wrong.

There are different tools and methods for debugging JavaScript code, depending on your browser and preference. One of the most common and powerful tools is the browser’s dev tools, which provide a graphical interface for inspecting and manipulating your code, as well as the web page’s elements, network, performance, and more.

To use the browser’s dev tools to debug JavaScript code, you need to do the following steps:

  • Open the dev tools in your browser. You can do this by pressing F12, or right-clicking on the web page and selecting “Inspect” or “Inspect Element”. Alternatively, you can use the browser’s menu and navigate to the devtools option. For example, in Chrome, you can go to More Tools> Developer tools.
  • Go to the Sources panel in the devtools. This is where you can see the files that the web page requests, including the JavaScript files. You can also edit and save the files here, as well
    as run snippets of code in the console.
  • Set a breakpoint in your code. A breakpoint is a point where the code execution will pause, and you can inspect the values of the variables, the call stack, the scope, and the watch expressions. You can set a breakpoint by clicking on the line number in the code editor, or by using the debugger keyword in your code. You can also set conditional breakpoints, which only pause the code if a certain condition is met.
  • Run your code. You can reload the web page, or trigger the code execution by interacting with the web page, such as clicking a button or filling a form. The code will pause at the breakpoint, and you can see the current state of your code in the JavaScript Debugging pane.
  • Step through the code. You can use the buttons in the JavaScript Debugging pane to control the code execution. You can step over, step into, step out, or resume the code execution. You can also jump to a specific line of code by using the Run to cursor option.
  • Modify the code. You can edit the code in the code editor, and save the changes by pressing Ctrl+S or Cmd+S. You can also evaluate expressions or run commands in the console, which is located at the bottom of the dev tools. The console also shows any errors or messages that your code generates.

Example:

  1. Utilizing the Console
    The console is perhaps the most basic yet powerful tool for debugging JavaScript. Here are some essential techniques:
    ● console.log(): The simplest debugging method. Use console.log() to print out values, variables, and messages to the console to understand the flow of your code.Other console examples include: console.table() and console.error()

  2. console.log("Hello, world!");

  3. Leveraging the Debugger
    The debugger statement is another invaluable tool for debugging JavaScript. Placing a debugger
    in your code pauses execution and opens the browser’s debugger tool, allowing you to inspect
    variables, step through code, and analyze the program’s state.

  4. function foo() {
    let x = 10;
    debugger;
    console.log(x); // Execution will pause here
    }
    foo();

  5. Monitoring Network Requests and Console Errors
    Debugging isn’t just about code logic; it also involves diagnosing issues related to network
    requests, console errors, and performance bottlenecks. Use the network tab in developer tools to
    monitor HTTP requests and responses, and pay attention to any error messages logged in the
    console.
    Remember that debugging is an essential skill for any developer, so embrace it as part of your
    coding journey! 🚀. I hope this helps you learn how to debug JavaScript code with your browser’s
    devtools. If you have any more questions, feel free to ask me.

Happy coding! 🚀

Reference & Source:

JavaScript Debugging – W3Schools. https://www.w3schools.com/js/js_debugging.asp.
How to Debug JavaScript with your Browser’s Devtools – freeCodeCamp.org
https://www.freecodecamp.org/news/how-to-debug-javascript-with-your-browsers-devtools/

Categories
Oracle APEX

Oracle APEX Application with PayPal As a Payment option

If you are developing an Oracle APEX application and want to integrate PayPal as a payment option, you might wonder how to do it. In this blog post, I will show you how to use the PayPal REST API to create and execute payments from your APEX app.

The PayPal REST API allows you to create and manage payments, invoices, subscriptions, and other transactions. You can use it to accept credit cards, PayPal, Venmo, and other payment methods. To use the PayPal REST API, you need to create a PayPal developer account and get an access token.

The steps to integrate PayPal to your APEX app are:

  • Create a PayPal developer account and get an access token.
  • Create a payment object using the PayPal REST API.
  • Redirect the user to the PayPal approval URL.
  • Execute the payment using the PayPal REST API.
  • Confirm the payment status and display a confirmation message.

Let’s go through each step in detail.

PayPal Setup

Here are the steps to signing up for a PayPal Developer Account:

  • Go to https://developer.paypal.com/ and click on Log In.
  • If you already have a personal or business PayPal account, you can use it to log in. If not, you will need to create one first by clicking on Sign Up.
  • Once you are logged in, you will see your dashboard with various options and resources. You can explore the documentation, try out the APIs, and manage your apps and credentials.
  • To create an app, click on My Apps & Credentials in the left menu. Then click on Create App under the REST API apps section.
  • Give your app a name and choose a sandbox account to associate it with. A sandbox account is a dummy account that you can use to test your integration without using real money or data.
  • Click on Create App. You will see your app details, including your client ID and secret, which you will need to authenticate your API calls.
  • You can also toggle between sandbox and live mode, edit your app settings, and view your app transactions and webhooks.
  • To test your integration, you can use the sandbox accounts that are automatically created for you when you sign up for a PayPal Developer Account. You can view and manage these accounts by clicking on Accounts under the Sandbox section in the left menu.
  • You can also create new sandbox accounts, add or remove funds, and simulate different scenarios using the sandbox testing guide.
  • When you are ready to go live, you will need to submit your app for review and approval by PayPal. You can do this by clicking on the Live tab on your app details page and following the instructions.

Congratulations! You have successfully signed up for a PayPal Developer Account and created your first app. You can now start accepting payments online using PayPal’s secure and convenient platform.

APEX Integration

I have built a Demo APEX Application that will demonstrate the integration.

  • PayPal Javascript SDK

  • The PayPal JavaScript SDK is a modern and flexible way to accept PayPal, credit cards, debit cards, and alternative payment methods on your website. It allows you to customize the payment experience, handle dynamic payment scenarios, and optimize performance.
    The PayPal JavaScript SDK consists of two main components: the PayPal script tag and the PayPal buttons. The PayPal script tag is a single line of code that you add to your HTML page. It loads the PayPal JavaScript SDK and initializes it with your client ID and other configuration options. The PayPal buttons are UI components that render the PayPal button and handle the payment flow. You can use the PayPal buttons to create different types of payment buttons, such as smart buttons, subscription buttons, or custom buttons.

To get started with the PayPal JavaScript SDK, follow these steps:

  • Add the PayPal script tag to your HTML page. Replace YOUR_CLIENT_ID with your sandbox or live client ID. You can also specify other configuration options, such as currency, intent, commit, vault etc. For more details, see https://developer.paypal.com/docs/business/javascript-sdk/javascript-sdk-configuration/.
  • Add an element with an id of “paypal-button-container” to your page. This is where the PayPal button will be rendered.

  • Loading PayPal JavaScript SDK by referencing it in the page’s JavaScipt FILE URLs section. Place this code at File URLs


// Load PayPal JS SDK Library.
https://www.paypal.com/sdk/js?client-id=&P16_PAYPAL_CLIENT_ID.¤cy=USD&intent=capture&enable-funding=venmo
// The URL above has four parameters;
Client_id => P16_PAYPAL_CLIENT_ID (Page Item)
Currency => USD
Intent => Get payments immediately

  • The code below (Code from PayPal Integration Builder) will be called when the user selects the payment option and captures the transaction in JSON object. Place this code at Execute when Page Loads


// Capture the Order Total.
var cartTotal = $v("P16_TOTAL");
const paypalButtonsComponent = paypal.Buttons({
// optional styling for buttons
style: {
color: "gold",
shape: "pill",
layout: "vertical"
},
// Prepare the PayPal transaction with the Order Total
createOrder: (data, actions) => {
const createOrderPayload = {
purchase_units: [
{
amount: {
value: cartTotal
}
}
]
};
return actions.order.create(createOrderPayload);
},
// finalize the transaction, called when user completes payment.
onApprove: (data, actions) => {
const captureOrderHandler = (details) => {
const payerName = details.payer.name.given_name;
// Store the PayPal JSON Response in an APEX Page Item.
$s("P16_PAYPAL_RESPONSE_JSON", JSON.stringify(details, null, 2));
};
return actions.order.capture().then(captureOrderHandler);
},
// handle unrecoverable errors
onError: (err) => {
// Additional Code required here to handle errors from PayPal.
console.error('An error prevented the buyer from checking out

When the user clicks the PayPal button, the PayPal SDK opens a dialog pop-up where one can log in with their personal or sandbox PayPal account (i.e. for testing purposes) and be able to make payments .

Once payment is done you will confirm your order