Beejartha

Categories
Wordpress

Monetizing Your WordPress Website: Strategies for Generating Revenue

Creating a WordPress website is a great way to share content, build an audience, and generate income. Whether you’re running a blog, an eCommerce store, or a niche website, there are several strategies you can use to monetize your site effectively. In this guide, we’ll explore various revenue-generating methods, including display ads, affiliate marketing, selling digital products or services, and membership models.

1. Display Ads

Display advertising is one of the most common ways to make money with a WordPress website. By placing ads on your site, you can earn money based on impressions (views) or clicks.

How It Works:

  • Sign up for an ad network like Google AdSense, Media.net, or Ezoic.
  • Place ad code on your website.
  • Earn revenue based on user engagement with the ads.

Pros:

  • Easy to set up and requires little maintenance.
  • Passive income potential.

Cons:

  • Requires significant traffic to earn substantial revenue.
  • Ads can impact user experience and website speed.

Tips for Success:

  • Use well-placed, non-intrusive ads to balance revenue and user experience.
  • Optimize for high CPC (cost-per-click) keywords to maximize earnings.

2. Affiliate Marketing

Affiliate marketing allows you to earn a commission by promoting products or services. When visitors purchase through your affiliate links, you earn a percentage of the sale.

How It Works:

  • Join affiliate programs like Amazon Associates, ShareASale, or Commission Junction.
  • Promote relevant products within your content.
  • Earn commissions when users make purchases through your links.

Pros:

  • High earning potential with the right audience.
  • No need to create or maintain products.

Cons:

  • Requires trust-building and a strong audience.
  • Earnings depend on users taking action.

Tips for Success:

  • Choose affiliate programs that align with your website’s niche.
  • Write detailed reviews and comparisons to increase conversions.

3. Sponsored Content

Brands may pay you to publish articles, reviews, or promotions about their products or services.

How It Works:

  • Brands approach you (or you reach out to them) for a sponsored post.
  • You create content featuring their product or service.
  • Get paid based on your website’s traffic and audience size.

Pros:

  • Can generate high earnings with the right partnerships.
  • Helps build relationships with brands.

Cons:

  • Too many sponsored posts may reduce audience trust.
  • Requires a well-established website with a loyal audience.

Tips for Success:

  • Only promote products you trust to maintain credibility.
  • Disclose sponsored content to comply with advertising regulations.

4. Selling Digital Products or Services

Selling your own digital products or services allows you to keep full control over your earnings.

Examples of Digital Products:

  • eBooks
  • Online courses
  • Stock photos, videos, or music
  • Printables and templates

Examples of Services:

  • Freelance writing, web design, or coaching
  • Consulting services
  • Custom development or design

How It Works:

  • Use a plugin like WooCommerce, Easy Digital Downloads, or MemberPress.
  • List and sell products directly on your website.
  • Process payments via PayPal, Stripe, or other payment gateways.

Pros:

  • No third-party involvement—full profit goes to you.
  • Unlimited earning potential.

Cons:

  • Requires time to create and market products.
  • Customer support may be needed.

Tips for Success:

  • Create high-quality products that solve specific problems.
  • Use SEO and social media marketing to drive sales.

5. Membership and Subscription Models

A membership or subscription-based website generates recurring revenue by offering exclusive content to paying users.

How It Works:

  • Use membership plugins like MemberPress or Restrict Content Pro.
  • Offer premium content, courses, or a community forum.
  • Charge users a monthly or annual fee for access.

Pros:

  • Recurring revenue ensures a steady income stream.
  • Builds a loyal and engaged community.

Cons:

  • Requires continuous content updates and maintenance.
  • Can be challenging to attract subscribers.

Tips for Success:

  • Provide unique, high-value content to retain members.
  • Offer different pricing tiers to attract more users.

Conclusion

Monetizing your WordPress website requires the right strategy and consistent effort. Whether you choose display ads, affiliate marketing, selling digital products, or offering memberships, success depends on understanding your audience and providing value. Test different monetization methods and optimize your approach to maximize your earnings!

Categories
Wordpress

Mastering WordPress Multisite: Managing Multiple Websites Easily

Managing multiple websites can be a daunting task, especially when it involves separate logins, updates, and user management for each site. Fortunately, WordPress Multisite simplifies this process by allowing you to control multiple websites from a single, unified dashboard. Whether you’re a business owner, a school administrator, or an agency managing client sites, WordPress Multisite provides an efficient solution to streamline operations.

What is WordPress Multisite?

WordPress Multisite is a powerful feature within WordPress that enables you to create and manage a network of websites using a single WordPress installation. This feature is especially useful for organizations or individuals managing multiple websites that share common themes, plugins, or administrative oversight.

Key Benefits of WordPress Multisite

  1. Centralized Management

    • Update themes, plugins, and the WordPress core across all websites from one location.
    • Manage users and roles across the network, ensuring streamlined permissions.
  2. Cost and Resource Efficiency

    • Save hosting resources by running multiple websites under one WordPress installation.
    • Reduce administrative overhead with consolidated management.
  3. Scalability

    • Add new sites quickly without needing to install WordPress repeatedly.
    • Suitable for agencies, universities, or businesses that anticipate growth.

Setting Up WordPress Multisite

Getting started with Multisite involves a few technical steps. Here’s a simplified guide:

  1. Enable Multisite in Your wp-config.php File

    • Open your wp-config.php file in the root directory of your WordPress installation.
    • Add the following line above the “That’s all, stop editing!” comment:

define(‘WP_ALLOW_MULTISITE’, true);

  • Save and upload the file back to your server.
  1. Choose Your Structure: Subdomains or Subdirectories

    • Subdomains (e.g., site1.example.com): Ideal for businesses managing unique domains.
    • Subdirectories (e.g., example.com/site1): A great option for internal or localized projects.
  2. Install Plugins and Themes

    • Install plugins or themes at the network level or for individual sites.
    • Use Multisite-specific plugins for enhanced control.
  3. Optimize with Multisite-Specific Plugins

    • Plugins like WP Ultimo simplify subscription management, site creation, and user control.
    • Other useful plugins include Multisite Enhancements and User Role Editor.

Installing Plugins and Themes in WordPress Multisite

Installing Plugins in Multisite

In a WordPress Multisite environment, plugins are installed by the Network Administrator and can be activated either network-wide or on individual sites within the network. Here’s how it works:

  1. Installing a Plugin Network-Wide
    • Go to the Network Admin Dashboard by clicking on your profile picture or site name in the top-left corner and selecting Network Admin > Dashboard.
    • Navigate to Plugins > Add New.
    • Search for the plugin you want to install or upload a plugin file (.zip).
    • Click Install Now and activate it network-wide.
    • A network-wide activation means the plugin will be active on all sites within the Multisite network.
  2. Activating a Plugin for Specific Sites

    • If a plugin is installed but not activated network-wide, it will be available for individual sites.
    • To activate it for a particular site:
      • Switch to the specific site’s dashboard.
      • Go to Plugins > Installed Plugins and activate it manually for that site.
  1. Using Multisite-Specific Plugins

    • Multisite-specific plugins are tailored to meet the needs of a Multisite environment. Examples include:
      • WP Ultimo: A plugin for managing subscriptions and creating user-friendly control panels.
      • Multisite Enhancements: Adds extra features like quick site switching, site usage statistics, and plugin management enhancements.

Installing Themes in Multisite

Themes in a Multisite network are managed centrally, but each individual site can choose and customize the theme that best suits its purpose. Here’s how it works:

  1. Installing a Theme Network-Wide

    • As the Network Admin, go to Themes > Add New in the Network Admin Dashboard.
    • Search for a theme or upload a theme file (.zip).
    • Click Install to make the theme available to all sites.
  2. Enabling a Theme for Specific Sites

    • After installation, themes are not automatically available for every site. You must explicitly enable them:
      • Navigate to Themes in the Network Admin Dashboard.
      • Click Network Enable under the theme you wish to make available.
    • Once enabled, individual sites can select the theme under Appearance > Themes in their respective dashboards.
  3. Multisite-Specific Themes

    • Some themes are designed specifically for Multisite use, often catering to subscription models, educational institutions, or franchises. Look for themes that support Multisite out of the box, ensuring compatibility and ease of use.

Benefits of Network-Wide vs. Individual Activation

Feature Network-Wide Activation Individual Site Activation
Control Centralized control over plugins/themes for all sites. Site admins have flexibility to choose what they need.
Resource Usage Efficient when the same tools are used across all sites. Allows unique customizations for each site.
Use Cases Ideal for plugins like security or SEO tools that should be consistent network-wide. Perfect for niche plugins/themes required by only one or a few sites.

Ideal Use Cases for Multisite

  • Educational Institutions: Schools or universities managing multiple departments or courses can create individual websites for each.
  • Agencies: Digital agencies can host client websites under one installation for easier updates and support.
  • Franchises: Businesses with multiple locations can maintain branding consistency while allowing local content control.

Best Practices for Plugin and Theme Management

  1. Evaluate Compatibility

    • Ensure plugins and themes are compatible with Multisite. Some plugins may not function correctly in a Multisite environment, so check the developer’s notes.
  2. Use Lightweight Plugins

    • Avoid bloated plugins that could slow down the entire network. Performance impacts on one site can affect the others.
  3. Keep Everything Updated

    • Centralized updates make it easy to keep plugins and themes secure and functional. Regularly update via the Network Admin Dashboard.
  4. Backup Your Network
    • Before installing or activating new plugins or themes, take a backup of your network. This precaution ensures you can quickly restore the network if something goes wrong.

Conclusion

WordPress Multisite is a game-changer for anyone managing multiple websites. By consolidating your administrative tasks and streamlining user management, you can save time, reduce costs, and focus on growing your digital presence. Whether you’re managing five sites or fifty, Multisite offers the tools and flexibility you need for efficient website management.

Categories
Wordpress

Improving WordPress Performance: Speed Optimization Tips

Introduction:

The introduction sets the stage by highlighting two key reasons for optimizing WordPress performance:

  1. Enhanced User Experience: A faster website ensures that visitors can browse without delays, leading to higher satisfaction and potentially lower bounce rates.
  2. Boosted SEO Rankings: Search engines like Google prioritize faster websites in their rankings, meaning speed can directly impact your site’s visibility.

Tips for Optimization:

  1. Using Lightweight Themes:

    • What are lightweight themes? Lightweight themes are designed to minimize unnecessary code and assets, ensuring faster load times.
    • Examples:

      • GeneratePress: Known for its simplicity and speed, GeneratePress is a highly customizable theme that performs well on all devices.
      • Astra: A versatile theme that is optimized for speed and works seamlessly with most page builders.
    • Why it matters: A heavy theme can slow down your site by loading excessive scripts, styles, or images. Lightweight themes reduce this burden, improving load times.
  2. Installing Caching Plugins:

    • What is caching? Caching stores frequently accessed data in a temporary storage area, allowing browsers to load the site faster for returning visitors.
    • Recommended Plugins:

      • WP Rocket: A premium plugin that offers advanced caching and performance optimization features like lazy loading and database cleanup.
      • W3 Total Cache: A free, robust option that improves overall site performance by caching pages, objects, and database queries.
    • Why it matters: Without caching, WordPress generates pages dynamically for every request, which can slow down response times. Caching reduces server load and speeds up delivery.
  3. Compressing Images:

    • Why compress images? High-resolution images can significantly increase page load times. Compression reduces file sizes without compromising quality.
    • Tools to Use:

      • Smush: A plugin that automatically compresses and optimizes images during upload.
      • TinyPNG: A web-based tool for manually compressing PNG and JPEG files.
    • Why it matters: Optimized images improve loading speed, especially on image-heavy websites, and save server bandwidth.
  4. Minimizing CSS and JavaScript Files:

    • What does minimizing mean? Minifying involves removing unnecessary characters (like spaces and comments) from CSS and JavaScript files, reducing file sizes and speeding up downloads.
    • Tools/Plugins:

      • Autoptimize: A plugin that aggregates, minifies, and caches scripts and styles to enhance performance.
    • Why it matters: Reducing the size of these files lowers the time browsers take to download and execute them, improving page load speed.
  5. Leveraging a Content Delivery Network (CDN):

    • What is a CDN?
      A CDN is a network of servers distributed globally that store copies of your website’s static assets (like images and scripts). Users download these files from the server closest to them.
    • Benefits:

      • Faster load times for visitors across different regions.
      • Reduced server load on your primary hosting.
    • Why it matters: CDNs improve website speed and reliability, especially for international audiences.
  6. Conducting Regular Performance Checks:

    • Tools for Testing:

      • GTmetrix: Provides detailed insights into your website’s speed, with recommendations for optimization.
      • Google PageSpeed Insights: Analyzes your website’s performance and offers specific suggestions to enhance speed on both desktop and mobile devices.
    • Why it matters: Regular checks help identify bottlenecks and ensure ongoing improvements, keeping your website fast and efficient.

Conclusion:

By implementing these tips, you can significantly improve your WordPress website’s speed and overall performance. A faster website not only attracts more visitors but also improves their experience and boosts your SEO efforts. Regular monitoring and optimization will keep your site running at its best.


Categories
Wordpress

Advanced Content Creation: Utilizing Custom Post Types and Taxonomies

Introduction

Engaging content is crucial for attracting and keeping visitors on your WordPress site. Custom post types and taxonomies can help you organize and present your content more effectively, creating a structured experience that’s easy for visitors to navigate.

What Are Custom Post Types?

Custom post types extend WordPress’s default content types—Posts and Pages—allowing you to create content tailored to your needs, such as portfolios, testimonials, or events. Custom post types make it easier to display specific kinds of information consistently across your site.

How to Create a Custom Post Type

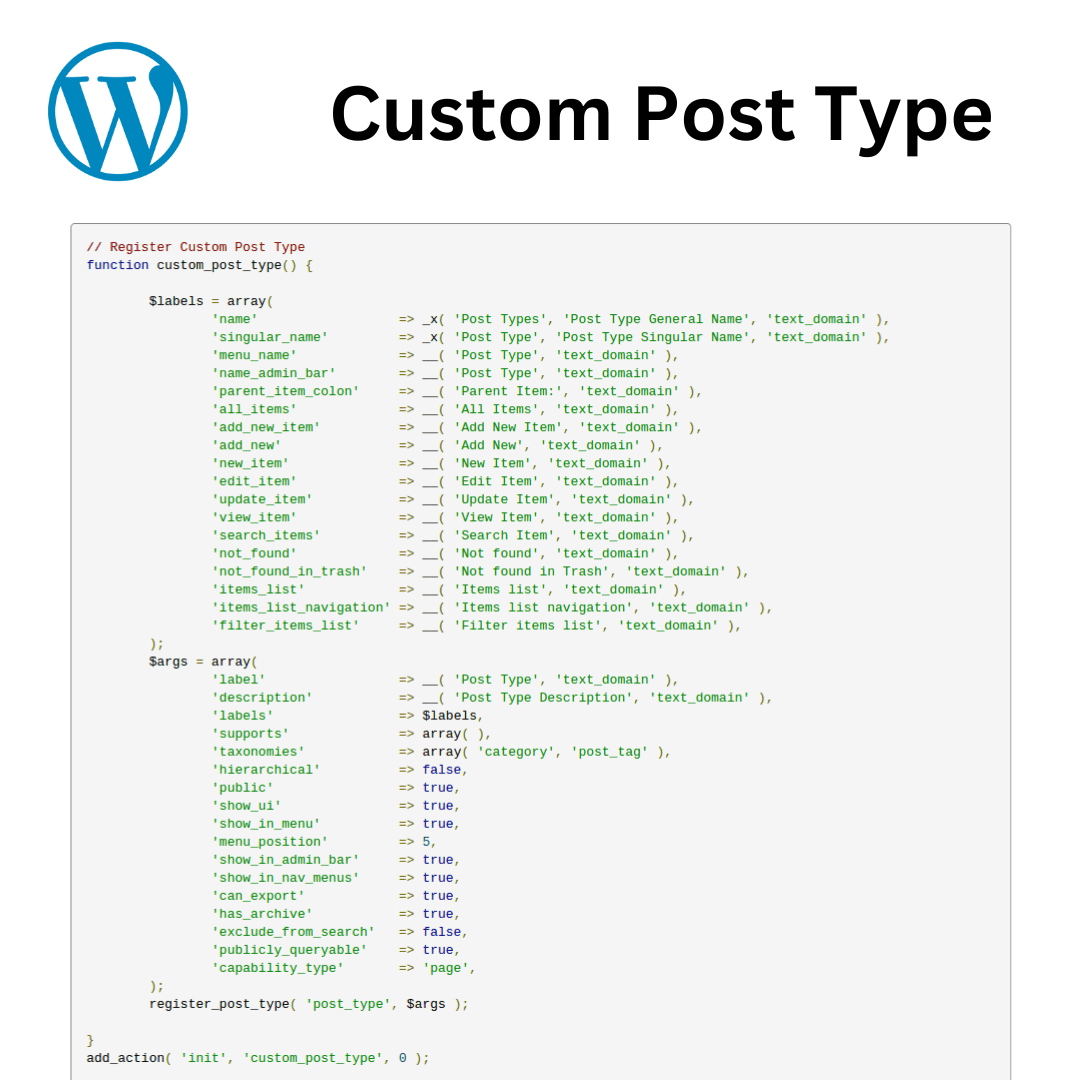
Creating custom post types can be done with code or plugins like Custom Post Type UI. Here’s how to create one with code by adding it to your theme’s functions.php file:


function create_custom_post_type() {
register_post_type('portfolio',
array(
'labels' => array(
'name' => __('Portfolios'),
'singular_name' => __('Portfolio')
),
'public' => true,
'has_archive' => true,
'rewrite' => array('slug' => 'portfolios'),
'supports' => array('title', 'editor', 'thumbnail'),
)
);
}
add_action('init', 'create_custom_post_type');

This code registers a custom post type called “Portfolio,” which supports titles, content, and featured images.

Understanding Custom Taxonomies

Custom taxonomies let you categorize or tag your custom post types in ways that fit your content. For example, if you create a “Portfolio” post type, you could add taxonomies like “Project Type” or “Client” to help organize these posts. Taxonomies improve navigation by grouping similar items, making it easier for visitors to find content.

Conclusion

Custom post types and taxonomies can enhance your website’s content management, allowing for a more organized, engaging experience. Experiment with these features to better structure your content and improve user navigation.

Categories
Wordpress

Essential Plugins for WordPress: Boosting Functionality and Performance

Introduction

Plugins are an essential feature of WordPress that empower users to extend the functionality and performance of their sites without needing coding skills. This post will dive into must-have plugins that can transform your WordPress experience by enhancing website security, SEO, user engagement, and overall performance.

What Are Plugins?

Plugins are software add-ons that bring specific features or functions to a WordPress site. With thousands of plugins available, users can tailor their sites to fit a variety of needs, from strengthening security to improving SEO, facilitating social media sharing, and boosting load times.

Must-Have Plugins for Enhanced Functionality and Performance

  • Yoast SEO

    Yoast SEO is a leading SEO tool, providing guidance and insights for optimizing posts, pages, and metadata. It features readability analysis, keyword tracking, and social media integration, all crucial for attracting and retaining organic traffic.

  • Wordfence Security

    Wordfence offers robust security features, including malware scanning, real-time threat defense, and a firewall to protect against unauthorized access. Its live traffic view provides a clear picture of who is visiting and any attempted attacks on your site.

  • WooCommerce

    WooCommerce is an essential plugin for anyone wanting to transform their WordPress site into a full-featured online store. With product management, payment processing, and customizable templates, WooCommerce is the go-to choice for e-commerce functionality.

  • Contact Form 7

    For handling inquiries and feedback, Contact Form 7 is a flexible solution that allows users to create and manage multiple contact forms with ease. It supports reCAPTCHA and Akismet for spam protection.

  • WP Super Cache

    WP Super Cache optimizes website speed by creating static HTML files from your dynamic WordPress content, reducing server load and load times for users. Faster page speeds improve user experience and SEO.

  • Elementor

    Elementor provides a drag-and-drop page builder that allows users to create custom layouts without any coding. It’s perfect for users who want more design flexibility and enables the creation of visually engaging content.

  • Smush Image Compression and Optimization

    Image-heavy sites benefit greatly from Smush, which compresses and optimizes images to reduce load times without compromising quality. This plugin also automatically compresses images as they’re uploaded.

How to Install Plugins

Installing a plugin is straightforward:

  1. Go to your WordPress dashboard.
  2. Click on “Plugins” and then “Add New.”
  3. Use the search bar to find the plugin you need.
  4. Click “Install Now,” and once installed, click “Activate.”

Many plugins come with dedicated setup guides or wizards to help users configure
settings easily.

Tips for Choosing Plugins

  • Read Reviews and Ratings
    Look at user reviews and ratings for insights on performance, compatibility, and
    support.
  • Check Compatibility
    Ensure the plugin is compatible with your current WordPress version to avoid issues.
  • Look for Regular Updates
    Plugins with frequent updates are more secure and less likely to have bugs.

Conclusion

The right plugins are instrumental in enhancing your WordPress website’s functionality, security, and performance. Start by identifying your goals and choose plugins that align with them. Whether you’re looking to improve SEO, boost security, or add e-commerce capabilities, these essential plugins can help take your site to the next level.

Categories
Wordpress

Securing Your WordPress Website: Best Practices

Introduction

Your WordPress website is a valuable asset, but it’s also a potential target for hackers. Implementing robust security measures is essential to protect your site from common threats such as malware, brute force attacks, and data breaches.

Keep WordPress Updated

Regular updates are your first line of defense. Always update WordPress core, themes, and plugins to ensure you have the latest security patches and features.

Use Strong Passwords and Manage User Roles

Secure your login credentials by using strong, unique passwords. Limit admin privileges to trusted users only, and assign the least privileged role necessary for each user.

Install Security Plugins

Leverage security plugins like Wordfence or Sucuri to monitor and protect your site. These plugins can block malicious traffic, scan for vulnerabilities, and provide firewalls to enhance security.

Back Up Your Website

Regular backups are crucial in case your site is compromised. Plugins like UpdraftPlus or services like VaultPress can automate backups, ensuring you can restore your site quickly if needed.

Conclusion

Website security should always be a priority. By keeping WordPress updated, using strong passwords, installing security plugins, and backing up your site, you can significantly reduce the risk of attacks and keep your site safe.

Categories
Wordpress

SEO Basics for WordPress: Optimizing Your Site for Search Engines

Introduction: The Power of Content in WordPress

Search Engine Optimization (SEO) is essential for driving traffic to your website. It helps your content rank higher on search engines like Google, increasing visibility and attracting more visitors.

On-Page SEO for WordPress

On-page SEO involves optimizing individual pages for specific keywords. Start by using target keywords in your content, headings, and URLs. Add meta tags—like meta descriptions and title tags—and ensure your content is structured with proper headers (H1, H2, etc.) for readability and SEO.

SEO Plugins for WordPress

Plugins like Yoast SEO and Rank Math can simplify SEO management. Both plugins provide tools to optimize your content, generate XML sitemaps, and check keyword density. After installation, configure settings like meta descriptions, focus keywords, and readability scores for each page or post.

Optimizing Images

Images are crucial for engaging content but must be optimized for SEO. Use descriptive file names, add alt tags with relevant keywords, and compress images to improve load times without sacrificing quality. This enhances user experience and site speed, which are key ranking factors.

Technical SEO

Technical SEO includes improving behind-the-scenes elements of your site. Ensure your XML sitemap is updated and submit it to Google Search Console. Use a robots.txt file to guide search engines on which pages to crawl. Finally, enhance site speed through caching plugins, optimized images, and clean code.

Conclusion

SEO is crucial for growing your website traffic. Implement these strategies—optimize content and images, use SEO plugins, and focus on technical SEO—to boost your WordPress site’s visibility. Start applying these tips today to improve your rankings and attract more visitors.

Categories
Wordpress

Understanding WordPress Themes: Choosing the Right Design for YourSite

Introduction

Your website’s theme is one of the first things visitors notice, making it a crucial component of your WordPress site. A well-chosen theme can enhance user experience, reflect your brand identity, and improve engagement. This guide will help you understand how to select the right theme for your needs.

1. What is a WordPress Theme?

A WordPress theme is a collection of files that dictate the look and feel of your website. Themes control layout, colors, fonts, and more. They can be customized to suit your brand’s identity and functionality needs.

2. Types of Themes

  • Free Themes: Available in the WordPress repository, these are a good starting point for beginners.
  • Premium Themes: Paid themes often offer more features, customization options, and support.
  • Custom Themes: Designed specifically for your needs, these can be built from scratch but may require a web developer’s expertise.

3. Factors to Consider When Choosing a Theme

  • Responsiveness: Ensure your theme looks good on all devices, including mobile phones and tablets.
  • Customization Options: Look for themes that allow easy customization without coding.
  • Loading Speed: A lightweight theme improves loading times, enhancing user experience and SEO.
  • Support and Updates: Choose themes that are regularly updated and come with reliable support.

4. Popular WordPress Theme Sources

  • WordPress.org: Free themes available for download.
  • ThemeForest: A marketplace for premium themes with extensive choices.
  • Elegant Themes: Known for their premium Divi theme, which offers powerful customization options.

5. Conclusion

Selecting the right theme is vital for your website’s success. Take the time to explore various options, test them on your site, and choose one that aligns with your goals.

Categories
Wordpress

Creating and Managing Content on WordPress

Introduction: The Power of Content in WordPress

Creating and managing content is the lifeblood of any successful WordPress site. Quality content not only engages visitors but also plays a key role in improving search engine rankings, increasing traffic, and building brand credibility. Whether you’re a blogger, business owner, or creative professional, mastering content creation on WordPress will empower you to connect with your audience effectively.

Understanding Posts vs. Pages

Before you start adding content, it’s crucial to understand the difference between posts and pages in WordPress. Posts are dynamic entries typically displayed in reverse chronological order, making them perfect for blogs, news updates, or articles. Pages, on the other hand, are static and best suited for timeless content such as About Us or Contact pages. Knowing when to use posts and pages helps you structure your site for both SEO and usability.

Creating a New Post: Step-by-Step Guide

Publishing a new blog post on WordPress is easy, but optimizing it for maximum reach requires a bit more effort. Here’s a quick guide:
1. Log into your WordPress dashboard and navigate to Posts > Add New.
2. Write your headline – ensure it’s engaging and includes your primary keyword for SEO.
3. Craft your content – keep it informative, engaging, and optimized with appropriate keywords.
4. Add images or media to break up the text and enhance readability.
5. Use categories and tags (discussed below) to organize your post.
6. Preview your post, and when satisfied, click Publish.

Using Categories and Tags: Organizing Content for SEO and UX

Categories and tags are essential tools for organizing content on your WordPress site. Categories help group related posts, making it easier for visitors and search engines to navigate your site. Tags act as more specific identifiers for post content. Proper use of categories and tags not only improves user experience but also boosts your SEO by providing clear site structure and internal linking.

Tips:
  • Use broad categories to group similar content (e.g., “Marketing Tips”).
  • Apply specific tags to capture the finer details (e.g., “Social Media Strategy”).
  • Avoid using too many categories or tags, as it may confuse users and dilute SEO value.

Formatting Content: Best Practices for Readability and SEO

Well-formatted content is easier to read, engaging, and optimized for search engines. Here are some key tips:

  • Use headings (H1, H2, H3) to break up text and signal important points to search
    engines.
  • Include images with alt text that describes the image and contains relevant keywords.
  • Embed videos or media where appropriate to enrich the content.
  • Write in short paragraphs to keep readers engaged and minimize bounce rates.

Conclusion: Start Creating Engaging Content

Creating content on WordPress is a rewarding process that, when done correctly, can enhance both user experience and SEO. Start publishing your posts today and experiment with categories, tags, and formatting techniques to refine your strategy. Stay tuned for more advanced content management tips in the next post to help you take your site to the next level!

Categories
Wordpress

Customizing Your WordPress Website: Themes and Plugins

Introduction:
Customization is crucial for creating a unique, personalized website that stands out. By customizing themes and plugins, you can tailor your site’s appearance and functionality to align with your brand or goals.


Understanding Themes:
Themes determine your website’s design and layout. They control everything from colors to fonts and overall structure. When choosing a theme, consider responsiveness, design flexibility, and whether it fits your site’s purpose (e.g., e-commerce or blogging).

Installing and Customizing Themes:
To install a theme, go to your WordPress dashboard, select “Appearance” > “Themes,” and choose from the free or premium options. Once installed, you can customize it by editing the header, colors, and widgets under the “Customize” tab.


Introduction to Plugins:
Plugins are add-ons that expand your site’s functionality. Whether you want to enhance SEO, add social media features, or improve site performance, plugins help your site do more without needing extensive coding knowledge.


Must-Have Plugins:
For essential functionality, consider plugins like:
● SEO: Yoast SEO or Rank Math
● Security: Wordfence or Sucuri
● Performance: W3 Total Cache or WP Super Cache
● Design: Elementor or Beaver Builder for page building

Conclusion:
Themes and plugins are the foundation of WordPress customization. By experimenting with both, you can create a professional, unique website tailored to your needs.